Loaded Cookie Bars

Happy Halloween everyone!!

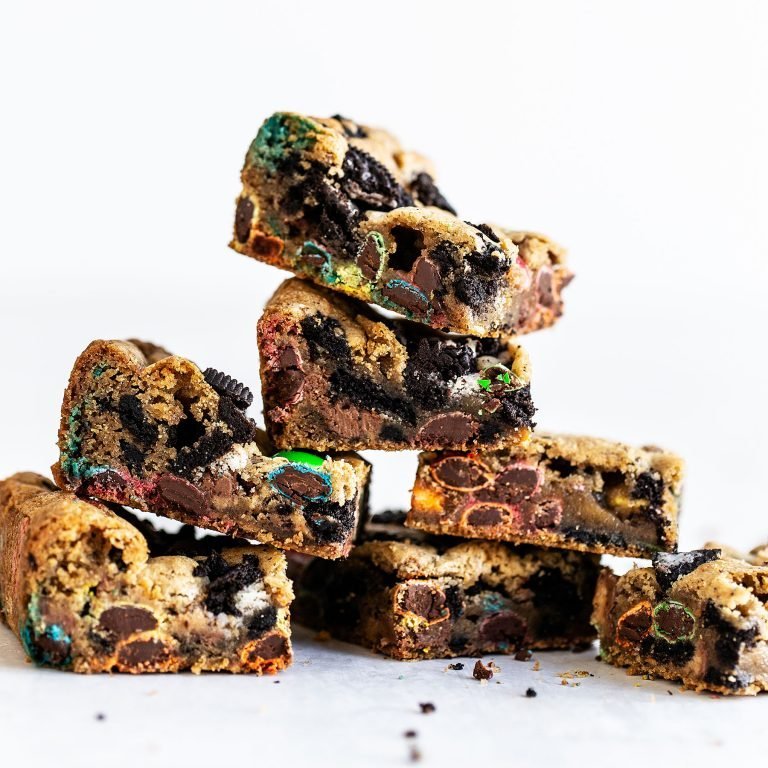
Our last post of the month is for when the parties are over and festivities conclude... aka when you're stuck with a bowl of leftover halloween candy!!

Instead of leaving them out to snack mindlessly, or tossing them, let's make Loaded Cookie Bars!

Image by: @handletheheat

Ingredients:
2 sticks unsalted butter, melted
1/2 cup granulated sugar
1 1/4 cups packed dark brown sugar
2 teaspoons vanilla extract
2 large eggs plus 1 egg yolk, room temperature
2 1/4 cups all-purpose flour
1 teaspoon baking soda
1 teaspoon sea salt
15 Oreo cookies, chopped
1 cup M&M candies
1 1/2 cups chopped chocolate candy

How-To:
Preheat the oven to 350°. Grease a 9 by 13-inch pan with nonstick cooking spray or butter.
In a large bowl, whisk the melted butter, granulated sugar, and brown sugar until very well combined. Add in the vanilla, eggs, and egg yolk and stir until well combined.
Gradually add in the flours, baking soda, and salt and stir until just combined. Fold in the Oreos, M&M’s, and chopped chocolate candy, reserving some to sprinkle on top.
Add the dough to the prepared pan, pressing evenly. Sprinkle with the reserved candy, pressing down lightly.
Bake for 25 minutes, or until golden brown but not overcooked - you want the centre to be soft and chewy! Cool completely before cutting into squares and serving.

And there you have it, the best way to handle what the trick-or-treater's left behind!

Poison Caramel Apples

Did someone say dessert? Don't worry - we could never forget the most important part of any meal - and these Poison Caramel Apples are a Halloween show stopper!!

Just like regular caramel apples, these are just as easy as they are delicious - just waayyy spookier!

Image by: @lilluna

Ingredients:
2 lbs cubed caramels
3 Tablespoons heavy cream
8 medium Granny Smith apples
Black food colouring (a gel will yield a more opaque black)
a few drops cinnamon flavouring/extract (optional)
sticks for apples (sturdy enough to support the weight of the apple when coating with caramel, and also will withstand the force of biting into the apple)
parchment paper
cooking spray

How-To:

First, prep the apples. Using a clean scrubber, wash the skin of the apples. When the apple is ready, the skin of the apple will no longer be shiny and all wax removed. Dry and set the apples in the refrigerator until ready to use.

Now the caramel. Unwrap the caramels then place them in a medium saucepan set over medium-low heat. Add the heavy cream and cook the caramels, stirring occasionally, until they melt and the mixture is a smooth consistency. Reduce the heat to low.

Add the gel food coloring into the melted caramel. If using flavoring, add flavoring at this time as well. Gently stir the caramel to make sure all of the coloring and flavoring are incorporated. Do not stir vigorously or air bubbles will appear.

Insert the apples with sticks and dry any of the juice around the stem with a paper towel or cloth.

Dip each of the apples into the caramel mixture, shaking off any excess and scraping any caramel off the bottoms of the apples.

Place the apple on the lightly greased parchment paper. Decorate the apple if desired.

Once all apples have all been coated with caramel, place in refrigerator for 30 minutes to set caramel.

Serve immediately or store in refrigerator for up to 3 days!

Happy Halloween Weekend everyone!!

Squid Ink Pasta with King Oyster Mushrooms and Cream Sauce

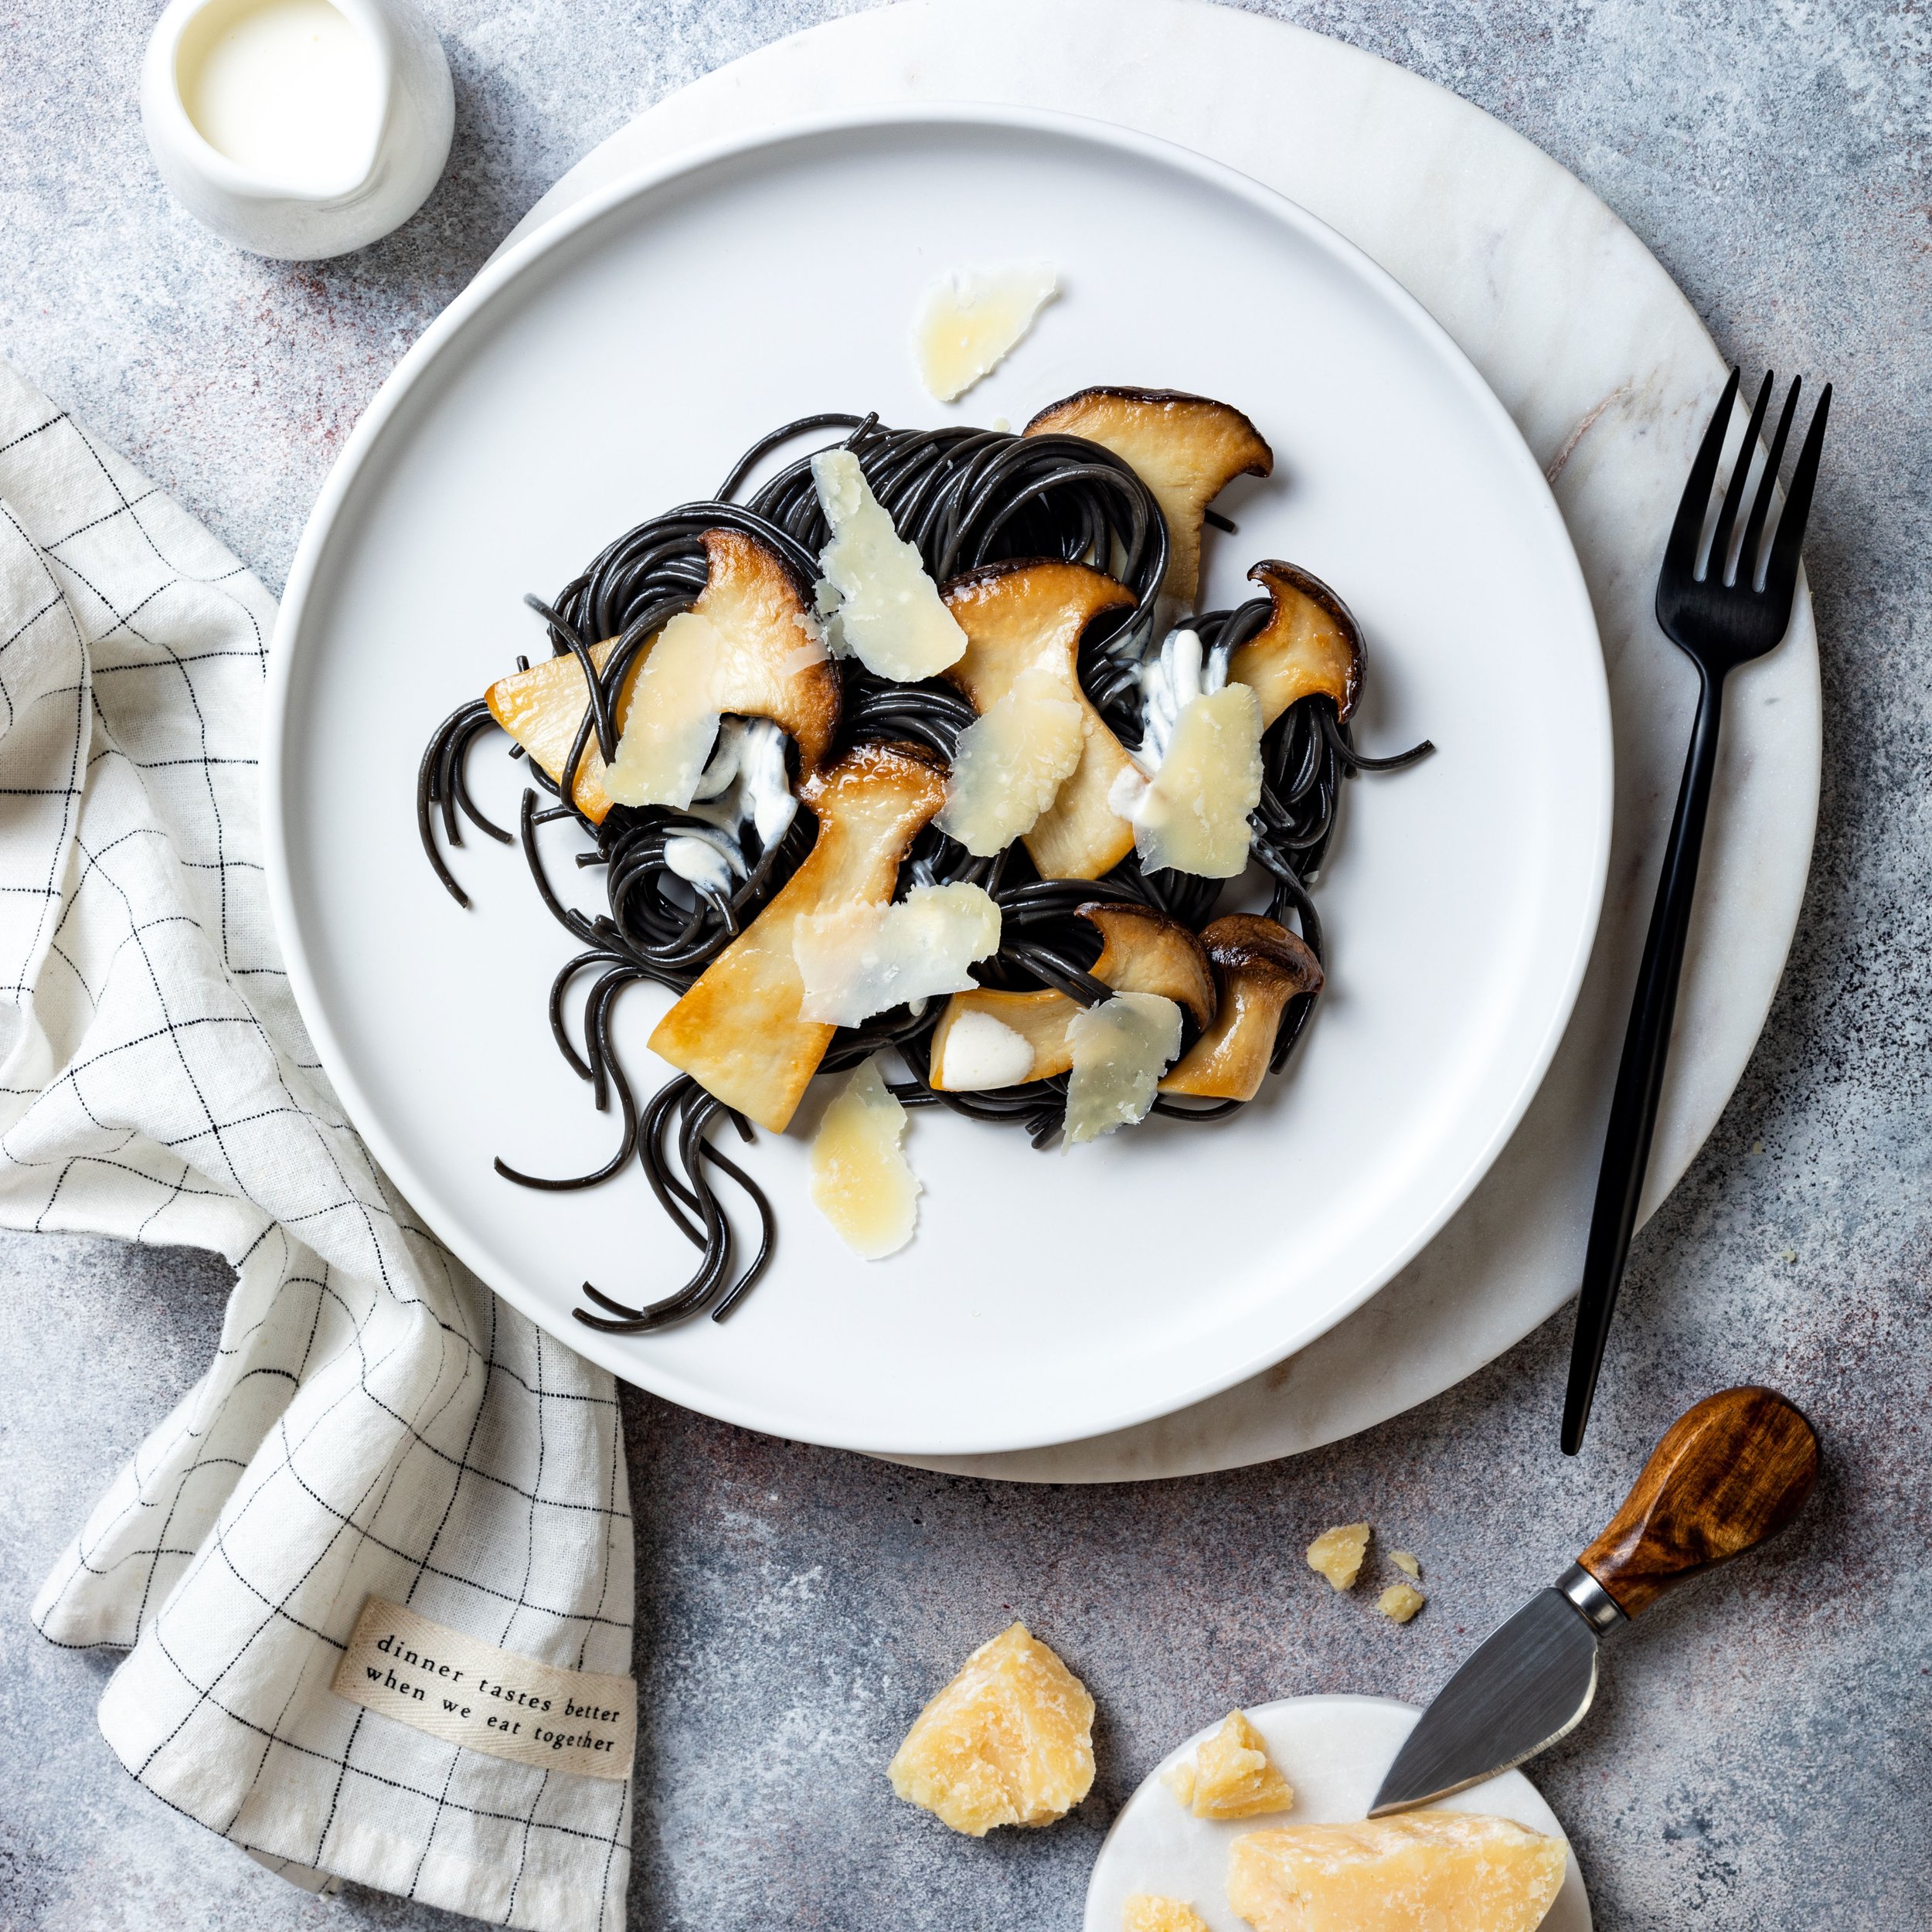
If there you ever needed a reason to indulge in black squid ink spaghetti - tis the season!

Pasta is always a great idea for dinner parties, since it's simple yet easy to elevate! To keep in line with our colour palette, we topped our spooky noodles with king oyster mushrooms, cream sauce, and parmesan.

Ingredients

400g dry squid ink pasta
6 king oyster, cut in half then into 3
1 shallot, chopped fine
4 cloves garlic, minced
2 Tbsp. butter, salted or unsalted
2 Tbsp. all-purpose flour
1 3/4 cups half and half (not fat-free)
1/3 cup freshly grated Parmesan cheese
1 tsp sea salt (or to taste)
1 tsp cracked black pepper (or to taste)
1/2 cup pasta cooking water

How-To:

1. Get your pasta cooking to the packet instructions.

2. Place a non sticking griddle pan over a high heat & add a touch of oil. Add the mushrooms and grill until golden with a little salt & pepper, about 4-5 minutes, flipping over the mushrooms half way through.

3. In a large non-stick skillet, melt butter over medium heat. Add garlic and cook for 30 seconds or until fragrant, stirring constantly. Stir in flour and cook for 1 minute or until lightly golden, again, stirring constantly.

4. Gradually whisk in half and half. Season with salt and pepper. Simmer until thickened, about 1-2 minutes, stirring occasionally. If any lumps form, just whisk them out. As for cook time, you basically want the sauce to cook just until thickened. Properly thickened sauce should coat the back of your spoon. Stir in Parmesan cheese.

6. For this dish, we like to serve the sauce on the side for two reasons: one, it's so rich and we like let guests add as much as they desire, and two, so that the dark black colour of the pasta remains when you plate!

Let us know in the comments below if you have ever tried squid ink pasta!

Spooky Roasted Root Vegetables

Bet you never thought a plate of roasted veggies could look so spooky!

Not only is this dish delicious, but sure to have guests doing a double take when you present is! All it took was one magic ingredient - balsamic glaze!
You'll definitely want to save this one down for next weekend 🧛

Ingredients:

Red beets, parsnip, and rainbow carrots
Olive oil
Big pinch of sea salt
Cracked black pepper
1/2 c. hazelnuts, toasted and roughly chopped (for garnish)
Balsamic glaze
Rosemary

How-To:

1. Preheat oven to 400. Rustically cut your variety of root vegetables. Toss in olive oil, sea salt, and cracked pepper. Place on a parchment-lined baking sheet. Roast for about 30 minutes, until tender.


2. If you need to roast your hazelnuts, here is an easy stove top method: In a medium skillet over medium heat, heat hazelnuts until browned and fragrant, stirring occasionally, about 5-10 minutes. While still hot, remove hazelnuts from skillet and wrap in a kitchen towel to steam for 1 minute. Rub nuts in the towel to remove loose skins (don't worry if there is still some skin left) and chop or use as desired.


3. Take your serving plate and drizzle layer of balsamic reduction directly onto the plate (this will create the 'pool of blood' affect). Arrange your roasted veggies on platter, garnish with roasted hazelnuts, and rosemary.

Be sure to tag us in all of your terrifying creations!!

Spider Nest Halloween Wreath

Weekends are for DIY projects!

As those who have been following us for a while know, we love starting our guests experience before they even walk through the door. From creative e-vites, to outdoor decor, we want to create a cohesive experience from start to finiish! That's where this month's DIY project comes in!

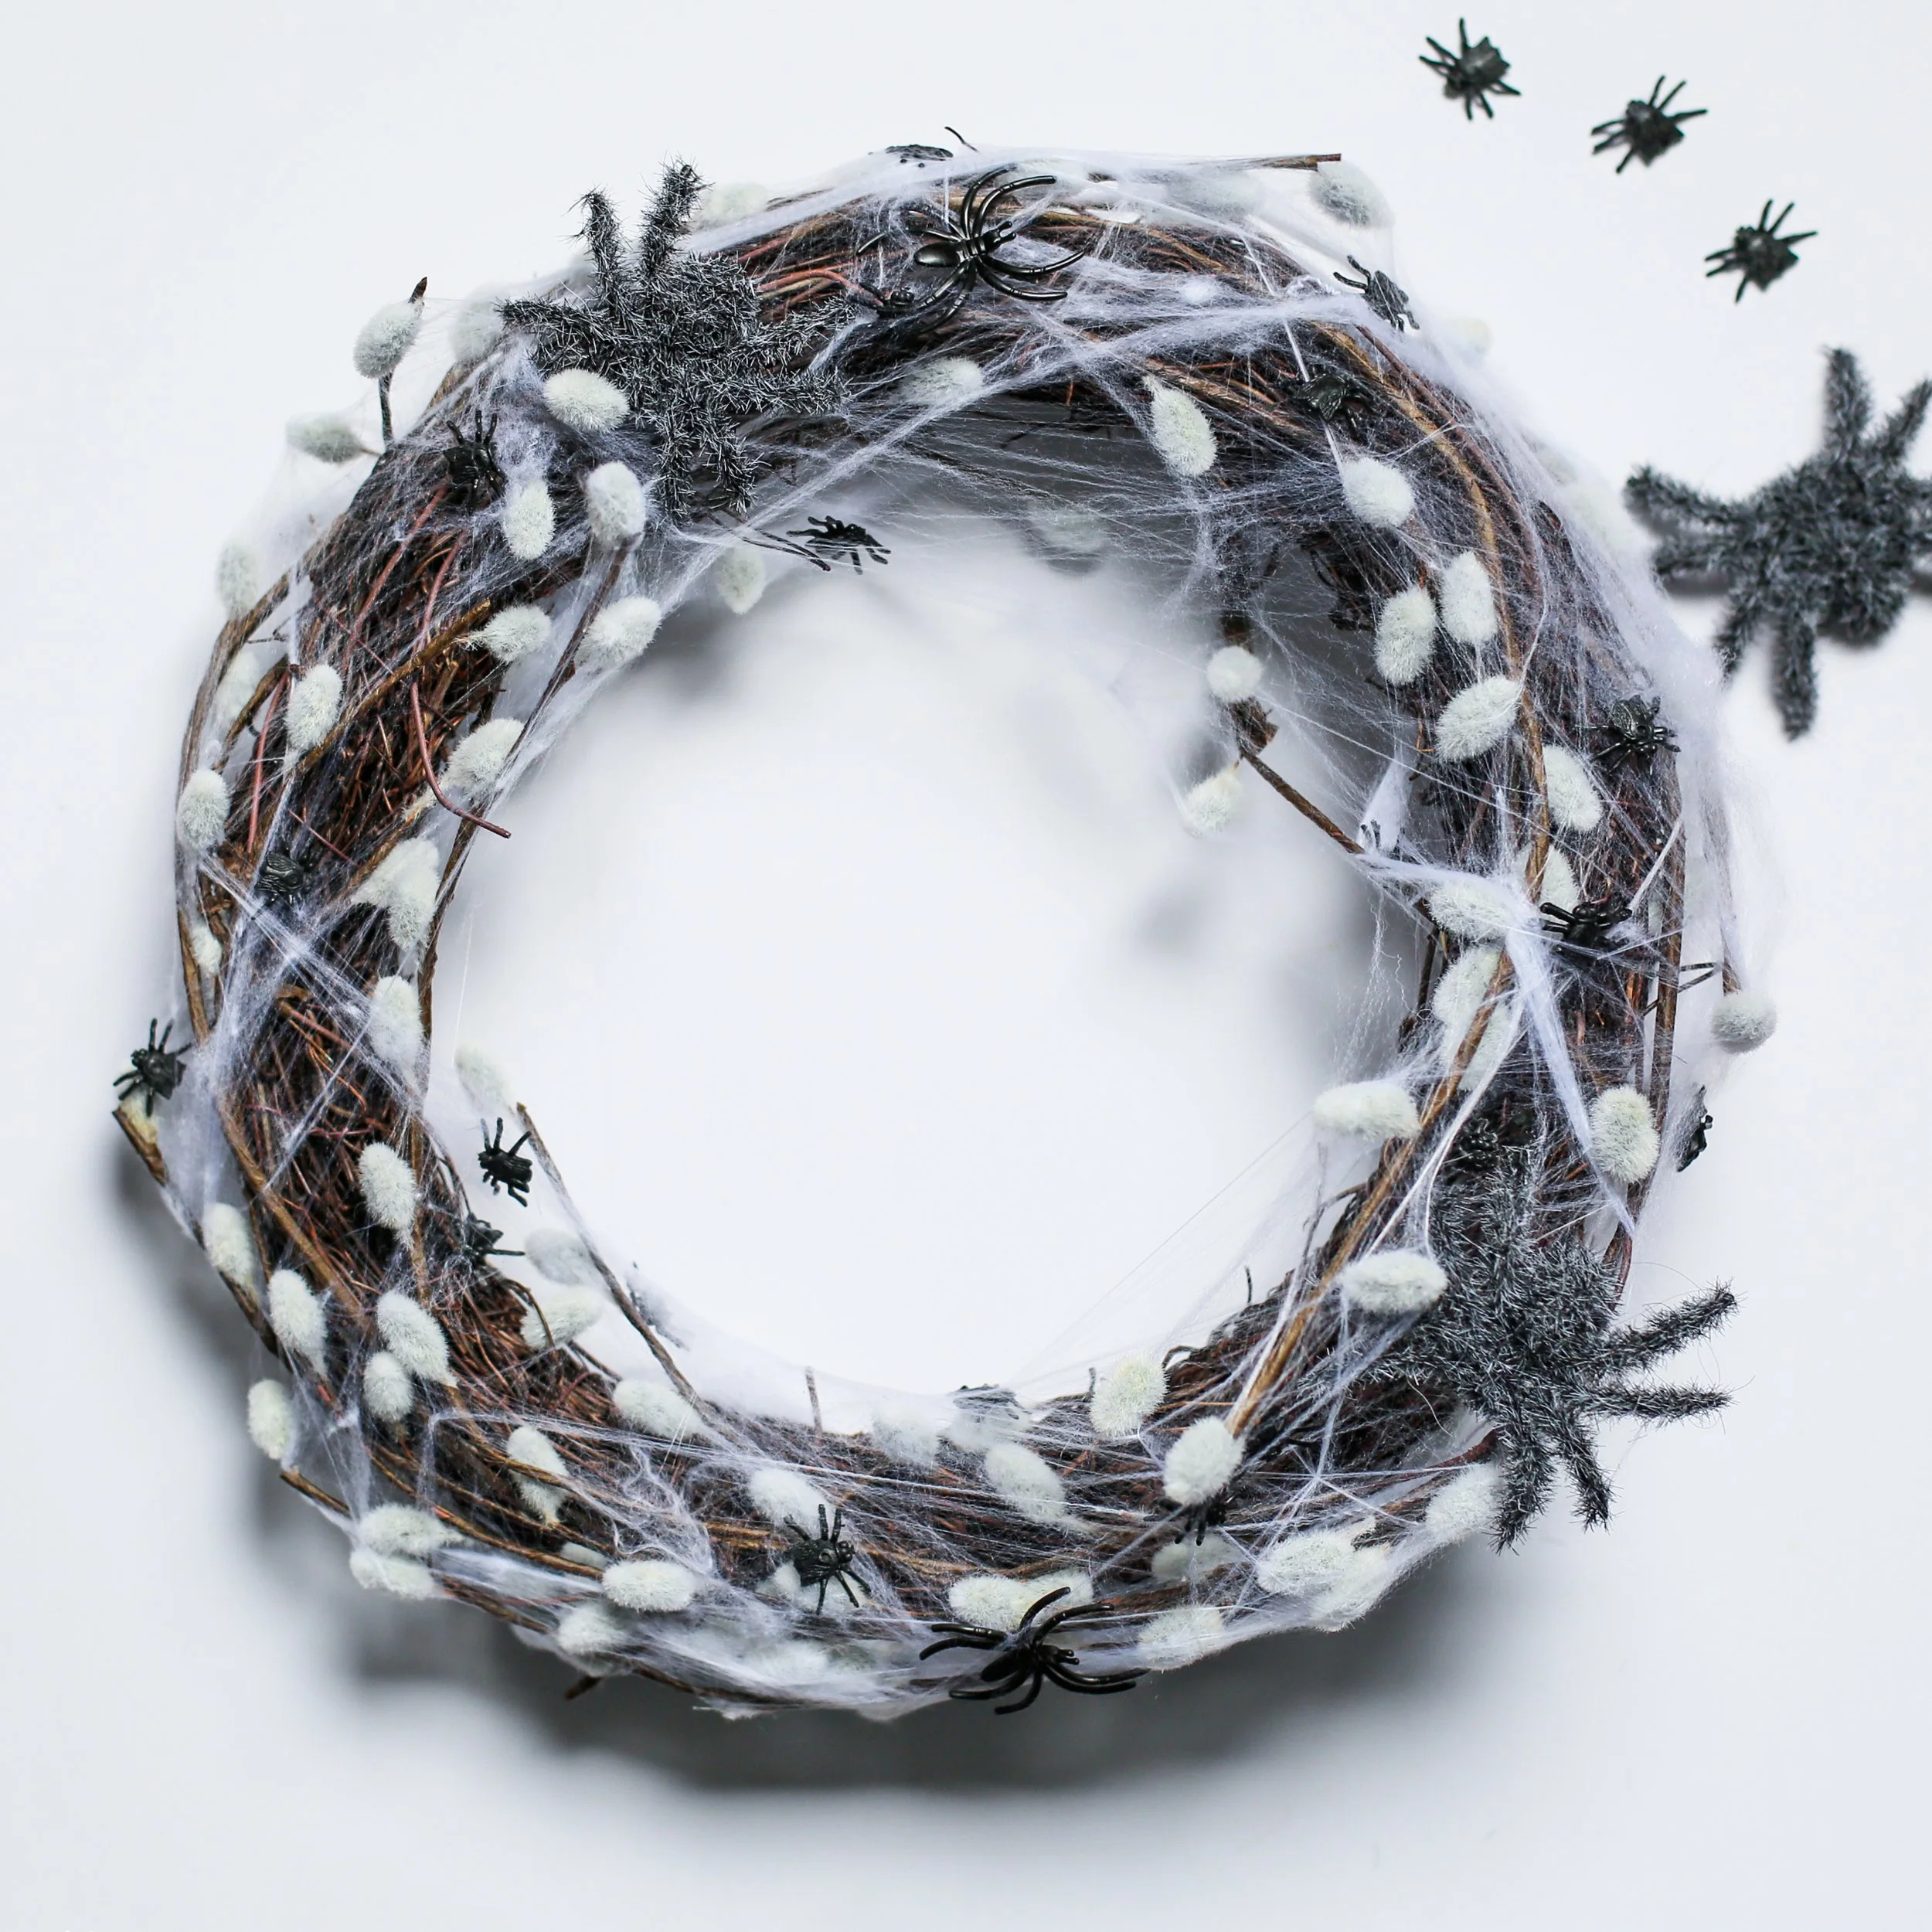
This Spider Nest Wreath is super simple, and super spooky! And, most importantly, matches the aesthetic of the event!

All you need is (see slide 4, we found all of these supplies at Dollarama!):

A wicker wreath
Spiders in various shapes and sizes
Faux pussy willow
Spider webbing

How-To:

1. Begin by weaving the faux pussy willow in and around your wicker wreath. Because the faux kind are wound around wire, they are easy to bend and move into place.
2. Take your spider webbing and start delicately wrapping the wreath in it. You'll want to keep it thin at first and add more as you go. You'll want it to look webby, but also still be able to see the willow bulbs underneath, as they give the illusion of spider eggs.
3. Stick the spiders in! You can put as many or as few as you like, this is the part where you make it your own!

And that's it, you now have the perfect way to welcome guests to your haunted evening!

The Black Widow Martini

Now that Thanksgiving is over, we can turn 100% of our attention to Halloween prep!

Today's post is all about the spooktacular Black Widow cocktail - but don't be fooled by it's midnight colouring, underneath that mysterious colour lies a sweet & fruity drink that everyone's sure to enjoy!

No food colouring involved, just a careful combination of colourful liquors will do the trick! Garnished with the 'real deal' Maraschino cherries - Luxardo cherries!

Ingredients:

2 oz vodka
1/2 oz blue curaçao
1 oz black raspberry whiskey
Juice from 1/2 of a lime
Luxardo cherries for garnish

How-to:

1. Add ice and all above ingredients to a cocktail shaker, shake until well combined.
2. Strain into glass of choice - we recommend a coupe or martini glass!
3. Garnish with 2 luxardo cherries on a skewer.

Serve immediately - the colder the better!

Check out our Reels to watch the cocktail come to life!

Creamy Butternut Squash Soup

For some dishes, plating really is everything 😍

pumpkin3.jpg

Is there anything more festive than serving this Creamy Butternut Squash Soup in a personal sized pumpkin!?

We absolutely love soup as a starting dish, especially as we enter the colder months. Combine those warming flavours with this gorgeous presentation - and you've got yourselves some happy guests!

First thing's first, the pumpkin bowls - they are super easy, we promise! Just grab as many pumpkins as you have guests (maybe one extra as a buffer), and dust off those pumpkin carving skills. Carefully cut of the tops of each, and scoop out the middle to create the bowl. Heat your oven to 400 and roast them briefly for 10-12 minutes (just to get the fragrances going!

Ingredients:

1 (3-pound) butternut squash, peeled, seeded, and cubed
2 tbsp extra-virgin olive oil
1 large yellow onion, chopped
½ tsp sea salt
4 garlic cloves, chopped
1 tbsp chopped fresh sage
½ tbsp minced fresh rosemary
1 tsp grated fresh ginger
1 tsp maple syrup
⅛ tsp ground nutmeg
3-4 cups vegetable broth
Freshly ground black pepper

For garnish
Chopped chives
Dollop of sour cream
Chili flakes (optional)

How-To:

1. Heat the oil in a large pot over medium heat. Add the onion, salt, and several grinds of fresh pepper and sauté until soft, 5 to 8 minutes. Add the squash and cook until it starts to soften, stirring occasionally, about 8-10 mins.

2. Add the garlic, sage, rosemary, ginger, and nutmeg. Stir and cook until fragrant (about 1 min), then add 3 cups of the broth. Bring to a boil, cover, and reduce heat to a simmer. Cook until the squash is tender, 20-30 mins.

3. Allow to cool briefly, then add mixture to blender (or use immersion blender in pot). Add the maply syrup, secure the lid, and blend until smooth. If too chunky/thick, gradually blend in the extra vegetable broth until desired texture.

4. Carefully ladle into your pumpkin bowls, garnish, and serve!

Let us know if you're going to give this one a try in the comments below!

Apple Cinnamon Rosettes

With the final day of month comes the final post of this theme - and of course we can't leave out dessert!

Apple1.jpg

We're all familiar with the flavour palette of Germany's beloved Apple Strudel, but as usual, we want to put a spin on things!

These Apple Cinnamon Rosettes serve up those festive flavours - in the most gorgeous way possible!

Ingredients for 6:
3 large red apples, cored and very thinly sliced
¾ cup white sugar
1 tbsp ground cinnamon
1/2 cup raisins (optional)
3 sheets frozen puff pastry, thawed
¾ cup melted butter
3 eggs
2 tbsp water
1 tbsp confectioners' sugar (for dusting at the end)

How-To:
1. Preheat oven to 400 degrees F. Grease/butter 6 spot muffin tray and dust with white sugar.
2. Place apple slices on a plate, overlapping slightly if necessary. Microwave on High about 45 seconds just until slices have softened a bit. Cover plate with and a kitchen towel to keep warm.
3. Combine sugar and cinnamon in a bowl. Roll out puff pastry sheet to less than 1/8-inch thickness. Using a pizza cutter, cut six 3-inch by 12-inch rectangles from sheets.
4. Spread melted butter over dough; top with a generous amount of cinnamon-sugar. Place apple slices along 1 long edge of dough, about 1/4 inch beyond edge of dough, overlapping slices slightly (see photo 3). Add raisins sparsely in with the apples if chosen to add them. Fold bottom half of dough over the apple slices (and raisins if added), keeping the rounded edges of apple slices exposed.
5. Combine egg and water in a bowl to create your egg wash. Brush exposed dough with egg wash. Sprinkle with more cinnamon-sugar, to taste.
6. Carefully, starting from one end, roll dough to form a rose-shaped pastry. Seal roll with end of dough strip & egg wash.
7. Gently place each rosette into the spots of the muffin tray.
8. Bake until nicely golden, approximately 45 minutes. Remove tray and let cool 5 to 10 minutes. Remove apple roses from tray and finish cooling on rack. Dust with confectioners' sugar before serving.

And voila! One of the most beautiful desserts you've ever made!

Be sure to tag us in your creations, we know you'll be giving this one a try!!

Apple2.jpg

Sausage Potato Stacks

Who knew an Oktoberfest canapé could look just as good as it tastes!?

These Sausage & Potato stacks are perfectly bite sized, and super easy to create!

stack.jpg

Ingredients (for 10 stacks):

2 medium russet potatoes
1 spanish onion
2 german sausages of choice
Olive oil
Sauerkraut
Dijon mustard
1/8 tsp garlic powder
Fresh chives
Salt + Pepper

How - To:

1. Preheat oven to 400. Wash and cut your potatoes into 1/2 inch thick medallions - you will need 20 pieces. Toss them in a drizzle of olive oi, and sprinkle of salt and pepper. Not too much salt - as the sausage will likely be quite salty!
2. Line a baking sheet with parchment, and lay out your potato slices evenly. Roast in the oven for 30-40 minutes, until they are a nice golden brown.
3. While the potatoes are roasting, cut your sausage into slices. We recommend slicing on a diagonal to create bigger/longer slices. Also slice your onion - thinly.
4. Place a heavy-bottom pan over high heat, and drizzle in a small amount of the olive oil. Once hot, add in the sliced sausage and caramelize for a few minutes (getting that flavour into the pan). Lower the heat and add onions, cook until caramelized.
5. Now begin assembling your stacks. The order is: potato slice, caramelized onion, dollop of dijon, potato slice, sauerkraut, sausage, chive, and skewer! Repeat until all stacks are complete!

Let us know if you give this one a try, and tag us in your creations!

German Cucumber-Dill Salad

Let's get our greens in with the German Cucumber-Dill Salad - or as the German's call it, Gurkensalat!

CS.jpg

This super simple side is the perfect accompaniment for any Oktoberefest feast. It pairs perfect with with anything from schnitzel to sausages, and roasted potatoes to spaetzel! It brings zest and tang to the likely richer dishes around the table.

Ingredients (for 4 servings):
1-2 cucumber, long and skinny. Sliced into thin medallions, if you have a mandolin even better!
3 tablespoons white wine vinegar
1 tablespoon honey
1/4 teaspoon salt
1/4 teaspoon freshly ground black pepper
1 small Spanish onion, thinly sliced
3 tablespoons fresh dill, chopped coarsely

How-To:
As easy as throwing it ingredients in a bowl, giving it a good mix, and it's ready to serve!

Let us know if you've ever tried this one!

Peach Tea Radler

Happy Sunday everyone - time to turn it into a funday!

This month's cocktail is for those who aren't the bigget beer fans but still want to join in the festivities of classic Oktoberfest fare.

The Peach Tea Radler is refreshing, delicious, and most importantly - served in a beer mug!

Ingredients (for 2):
1 cup light beer (or beer of choice)
1 cup lemonade
1/4 cup peach brandy
ice
lemon or peach slices for garnish

How-To:
Add ice to your two beer mugs
Split the beer, ice tea, and beach brandy evenly between the mugs.
Stir and serve.

Prost!!

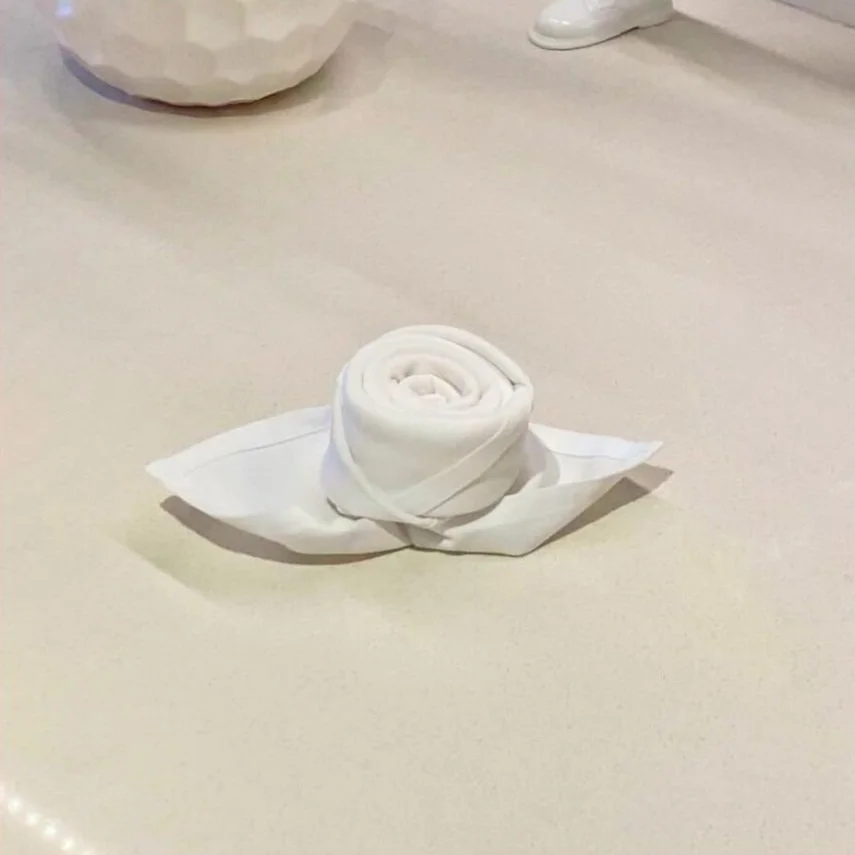
The Best Napkin Hack For Any Budding Host!

Decor hack alert!!

Today we're sharing one of our favourite ways to stay on-theme with your table setting, without breaking the bank or compromising style.

Napkins are one of the easiest ways to bring colour into your tablescape, but buying a set of 'on theme' napkins for every event isn't exactly economical. Luckily, you can find the paper option in almost any theme, either online or at your local party store!

Here's where the hack comes in: grab your favourite white or neutral cloth napkins, and combine with your funky paper ones! This way you're presenting guests with a high-end linen, while still giving it a twist that is sure to tie into the rest of your decor!

Let us know if you've ever given this one a try - and be sure to tag us in your creations!!

plate2.png

pretzel Variety Board

Pretzels at Oktoberfest are like hotdogs at baseball games - a must!!⁣⁣

pretzels.png

Pretzels at Oktoberfest are like hotdogs at baseball games - a must!!⁣⁣
⁣⁣
So of course, our first food post is dedicated to this iconic tradition. For our festivities, we decided to create a Pretzel Variety Board - with a few different versions of the salty snack, and 3 homemade dips that pair perfectly! ⁣⁣
⁣⁣
First, the pretzel varieties:⁣⁣
⁣⁣
Whether you bake them fresh at home, or buy from your local bakery, the soft style NEEDS to be included. They are by far our favourite kind, and add a different texture to the mix within the crunchier options.⁣⁣
⁣⁣
Then you'll have the hard pretzels. We recommended getting 3-4 different types (flavours and shapes), as it makes the finished board look a little more interesting. For example, here we have some of the traditional shape/flavour, honey twists, and parmesan & herb pretzel crackers. Like any grazing board, the key is to create a harmonious medley!⁣⁣
⁣⁣
Secondly, the dips:⁣⁣

⁣⁣
Honey Mustard (whisk together in bowl):⁣
1/2 cup mayonnaise ⁣⁣
1 Tbsp Dijon mustard ⁣⁣
1 Tbsp yellow mustard ⁣⁣
3 Tbsp honey ⁣⁣
1 tsp apple cider vinegar ⁣⁣
1/8 tsp garlic powder ⁣⁣
Pinch of salt ⁣⁣

honey mustard dip.png

⁣⁣Sriracha Hummus (combine in food processor until smooth):⁣⁣
1 can chickpeas, drained & rinsed⁣⁣
1/2 cup extra-virgin olive oil⁣⁣
1/3 cup sriracha sauce⁣⁣
2 1/2 tablespoons lime juice⁣⁣
3 cloves garlic ⁣⁣
1/4 cup water (optional, if needed)⁣⁣
salt , to taste⁣⁣

roasted red pepper dip dip.png

Kale & Edamame Spread (combine in food processor, pulse until desired consistency):⁣⁣
4 large cloves garlic⁣⁣
2 cups cooked edamame beans⁣
Pinch salt and pepper ⁣⁣
4 tablespoons olive oil ⁣⁣
Juice from 2 limes juice⁣⁣
1/4 cup chopped fresh cilantro ⁣

Seb & Sheila's Guide to Oktoberfest Beer

If you couldn't tell by our outfits (and giant beer mugs) this month's theme is Oktoberfest!!

Now, we know what you're thinking - Oktoberfest in September?? Well, contrary to what the name describes, much of Oktober fest is actually celebrated in September (typically an 18 day event, from end of Sept to beginning week of Oct). This way, we share all of our festive tips in time for you to throw your bash!

To get started, we thought we had to start with the basics of Oktoberfest - the beer!! Traditional Oktoberfest in Munich, there is really only one overarching rule: Only beer from Munich’s six main breweries are allowed to be served. This means, only beer from the following breweries can be sold at Oktoberfest:

Augustiner
Hacker-Pschorr (available at LCBO & Beer Store)
Hofbräu (available at LCBO)
Löwenbräu (available at LCBO & Beer Store)
Paulaner (available at LCBO & Beer Store)
Spaten (available at Beer Store)

Swipe through to learn more about the options we have available to us here in Canada!

Spanish Almond Cake

It's the last day of the month, and the last course of the meal - dessert!

cake.jpg

It's the last day of the month, and the last course of the meal - dessert!

This Spanish Almond Cake, also known as Tarta de Santiago, is sweet, moist, flavoured with almonds and lemon, and not to mention gluten-free!

The simple ingredients come together to make an incredibly moist and tender cake. One of the most beautiful things about this cake is that the main ingredients are added in equal amounts - making the baking process that much easier.

Ingredients:
1 1/4 cups granulated sugar
2 1/2 tsp lemon zest
1/2 tsp kosher salt
1/2 tsp vanilla extract
1/4 tsp almond extract
5 large eggs separated, room temperature
2 1/4 cups almond flour
1/2 cup thin sliced almonds, toasted
3 tablespoons raw sugar

How-To:
1. Preheat oven to 350°F. Butter & flour a 9-inch cake pan and line it with parchment paper.
2. Add sugar and lemon zest to mixing bowl, massage together. Add the egg yolks, salt, almond extract, and vanilla extrac - whisk vigorously until the sugar is dissolved. Mix in the almond flour with a spatula untel well combined - the batter will be stiff.
3. In a clean bowl, beat the egg whites on medium speed until soft peaks form.Fold in the whipped egg whites into the almond batter until the egg whites are fully mixed in and no white streaks remain.
4. Add the batter into the pan. Use an offset spatula to smooth and even out the batter. Sprinkle the sliced almonds and the raw sugar over the cake batter.
5. Bake for 35-40 minutes until the center of the cake is done.
6. Remove the cake from the oven and use a spatula to loosen the cake from the sides of the pan and allow it to cool in the pan for 15 minutes. Invert the cake onto a cooling rack and then revert it back to top up your serving plate of choice.
7. Allow the cake to completely cool. Dust the top with icing surgar, and serve it with whipped cream, fresh fruit, jam, or a simple cup of tea!

Be sure to tag us in your creations if you give this recipe a try!

Spanish Charcuterie Board

Charcuterie boards are easily one of the staple 'know hows' in any seasoned host's arsenal. So today we're sharing a quick guide to a Spanish themed version!

7.png

Creating a 'grazing station' is always a great way to welcome guests, and give them an idea of where they should be mingling while everyone arrives and settles in. Because these can be sooo versatile, we're sticking to the basics with meats, cheeses, and a couple add ons - leaving room for you're own creativity & taste!

Meats:

Lomo - Spanish for Tenderloin, lomo is one of the finest of Spanish cured meats. An entire pork loin beautifully cured and ready for cutting into thin slices. Typically seasoned with garlic, sea salt and smoked paprika - it's got such a powerful flavour while being naturally low in fat.

Jamon Serrano - Essentially Spain's version of prosciutto, almost identical in appearance and flavour. The extended curing transforms the ham, creating an intense flavour and aroma.

Chorizo - An intensely seasoned, hard Spanish pork sausage. Favoured with pimento (smoked paprika), garlic, and salt - and you can find many flavour profiles from sweet to spicy. One of the strongest options flavour wise.

Cheeses:

Valdeón - A Spanish blue cheese made in Posada de Valdeón. Like many blue varieties, it is a very strong-flavoured cheese, tangy and a bit spicy.

Manchego - Possibly the most well known Spanish cheese, popular for it's light & mild flavour profile. Some describe it as slightly reminiscent of sour cream or tangy cheesecake. This one is definitely for anyone who isn't a fan of big bold cheese flavour.

Mahón - A unique cheese with a sweet and fruity aroma and a rich, bold flavour, Mahón is not for those who prefer bland cheeses.

Extras:

Olives - In our opinion, olives are a staple on most charcuterie boards, for the simple fact of adding a bit of saltiness without literally adding salt! The Spanish are known for their love of olives, often enjoyed before a meal as an appetizer!

Marcona Almonds - A type of sweet, gourmet almond from Spain that is very popular in Mediterranean countries. Often referred to as “Queen of Almonds”, they’re a great way to add nuts to the board while remaining on theme!

And there you have it, a perfect starting point for a charcuterie board imported straight from sunny Spain!

Agua de Valencia

It's time for a midweek pick me up - Spanish edition!

agua.png

Fresh orange juice & cava are the star performers in this classic Agua de Valencia recipe. This popular Spanish cocktail is refreshing, sweet, and sort of like the love child between the mimosa & skrewdriver.

The recipe is said to have been developed in 1959 by Constante Gil in the Café Madrid in Valencia. But don't be fooled by it's bright and fruity appearance, because it packs a powerful punch! Traditionally sold in pitchers and served in champagne-style cocktail glasses, we like to prepare it the same way.

Ingredients for 1L:

500 ml orange juice (freshly squeezed if possible)
300 ml cava semisweet sparkling wine- chilled
100 ml vodka
100 ml gin
About 1 cup of ice

Stir it all together and you're done! Of course we love a garnish, so be sure to slice up a few orange wedges for your coupes!

Cheers!

Shrimp & Chorizo Skewers

Surf & Turf tapas edition!

Next on the menu are these Shrimp + Chorizo skewers, served in individual portions with Spicy Roasted Red Pepper Sauce.

We especially love to put this one together for a more cocktail party setting, as they're nicely plated for easy consumption if it's more of a standing vibe. They're also perfect as the 'welcome canapé' while guests arrive and mingle - before sitting down to the plated meal!

Ingredients - this is for 15 servings, you can scale up or down based on guest list:
1/4 pound medium shrimp (about 15 shrimp), raw, peeled and deveined
1/2 package of Spanish chorizo, sliced into 1/4-inch rounds
1 clove garlic, finely minced
1/2 tsp salt
1/2 tbsp lemon juice
1 tbsp cup extra-virgin olive oil
1 tbsp chopped fresh parsley

For sauce:
1 red bell peppers
1/4 cup crushed tomato
1 small clove garlic, minced
1/4 tsp honey (optional)
1/4 tsp salt (or to taste)
1/2 tbsp chopped fresh basil
1/4 tsp red chili pepper flakes, adjust to your taste

How-To:
1. In a medium bowl, combine: garlic, salt, lemon juice, fresh parsley, and olive oil. Add shrimp, toss to coat evenly. Let marinate in the refrigerator for 30 mins.

2. While marinating, prepare sauce: Cut pepper into quarters and remove seeds. Roast pepper in a hot cast iron skillet until charred all over. Transfer to a bowl and cover until cool enough to handle. Peel skin, and discard. Transfer to a blender with crushed tomato, salt, honey, basil, garlic, and chili pepper flakes. Pulse until smooth, divide into desired serving glasses. Set aside.

3. Skewer one shrimp and one round of chorizo onto wooden skewers. Repeat the same process with the remaining shrimp and chorizo.

4. Heat 1 tablespoon of olive oil in a large pan on medium-high heat. Add skewers into the pan and sear on both sides (until the shrimp are cooked through and the chorizo is lightly browned) about 3-4 minutes. Repeat until all skewers are cooked. Season with salt and pepper, and arrange each skewer into a glass with the sauce. Garnish with fresh parsley and serve immediately.

We know you guys are going to try this one out, so be sure to tag us in your creations!

Enjoy!