Spice up your next BBQ party with these DIY Spice Rub Jars! 🔥✨
These jars make a great parting gift for all those BBQ-loving guests and double as a pretty talking piece that can brighten up the table. It is a treasure trove of tantalizing flavours, waiting to be unleashed by your guests. From zesty citrus blends to aromatic herb medleys, we’ve got the perfect spice combinations to take your BBQ dishes from ordinary to extraordinary.
Watch as we create the ultimate spice combinations for a spice rub that can be used for much more than ribs. All you need is a couple of your favourite spices and pour all the ingredients inside your jar. So grab your apron, and let’s get our grill on! 🍖 🌶️💥
How to Host the Perfect BBQ Party this Summer
When it comes to enjoying summer days, nothing beats a casual BBQ with friends and family to kick off the season. As we bid farewell to cooler days and hello to warmer weather, we like to fire up the grill and enjoy the season of sipping cocktails al fresco under the sun.☀️🍹
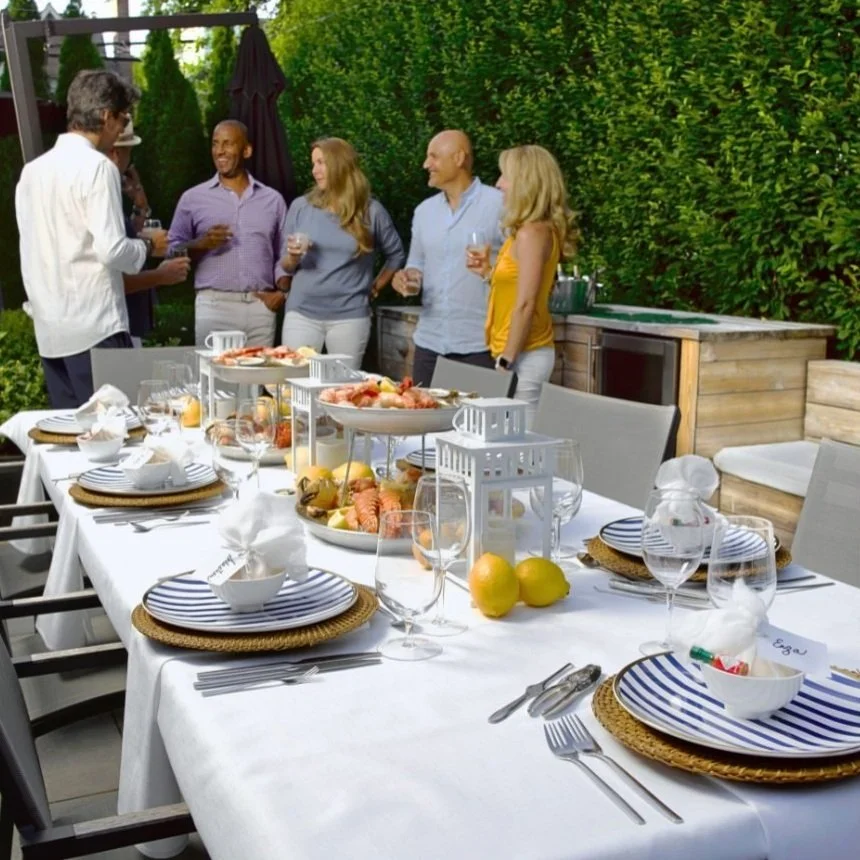
We usually recommend 6 to 8 people for a backyard BBQ, but it's not unusual for a few last-minute friends to increase those numbers. As a result, we try to present a range of surf and turf-style dishes to ensure that no one leaves hungry, no matter how many people turn up.🍗🍖
Backyard barbecues are ideal for splitting up entertaining chores, with one person tending to the grill and the other seeing visitors and doing any last-minute errands. The majority of the preparation for this gathering may be done ahead of time, allowing you to relax and enjoy the great weather while it
Now that the table is set, we invite you to dust off your grills (if you haven't already) and follow us all month as we walk you through how to achieve this spectacular gathering!
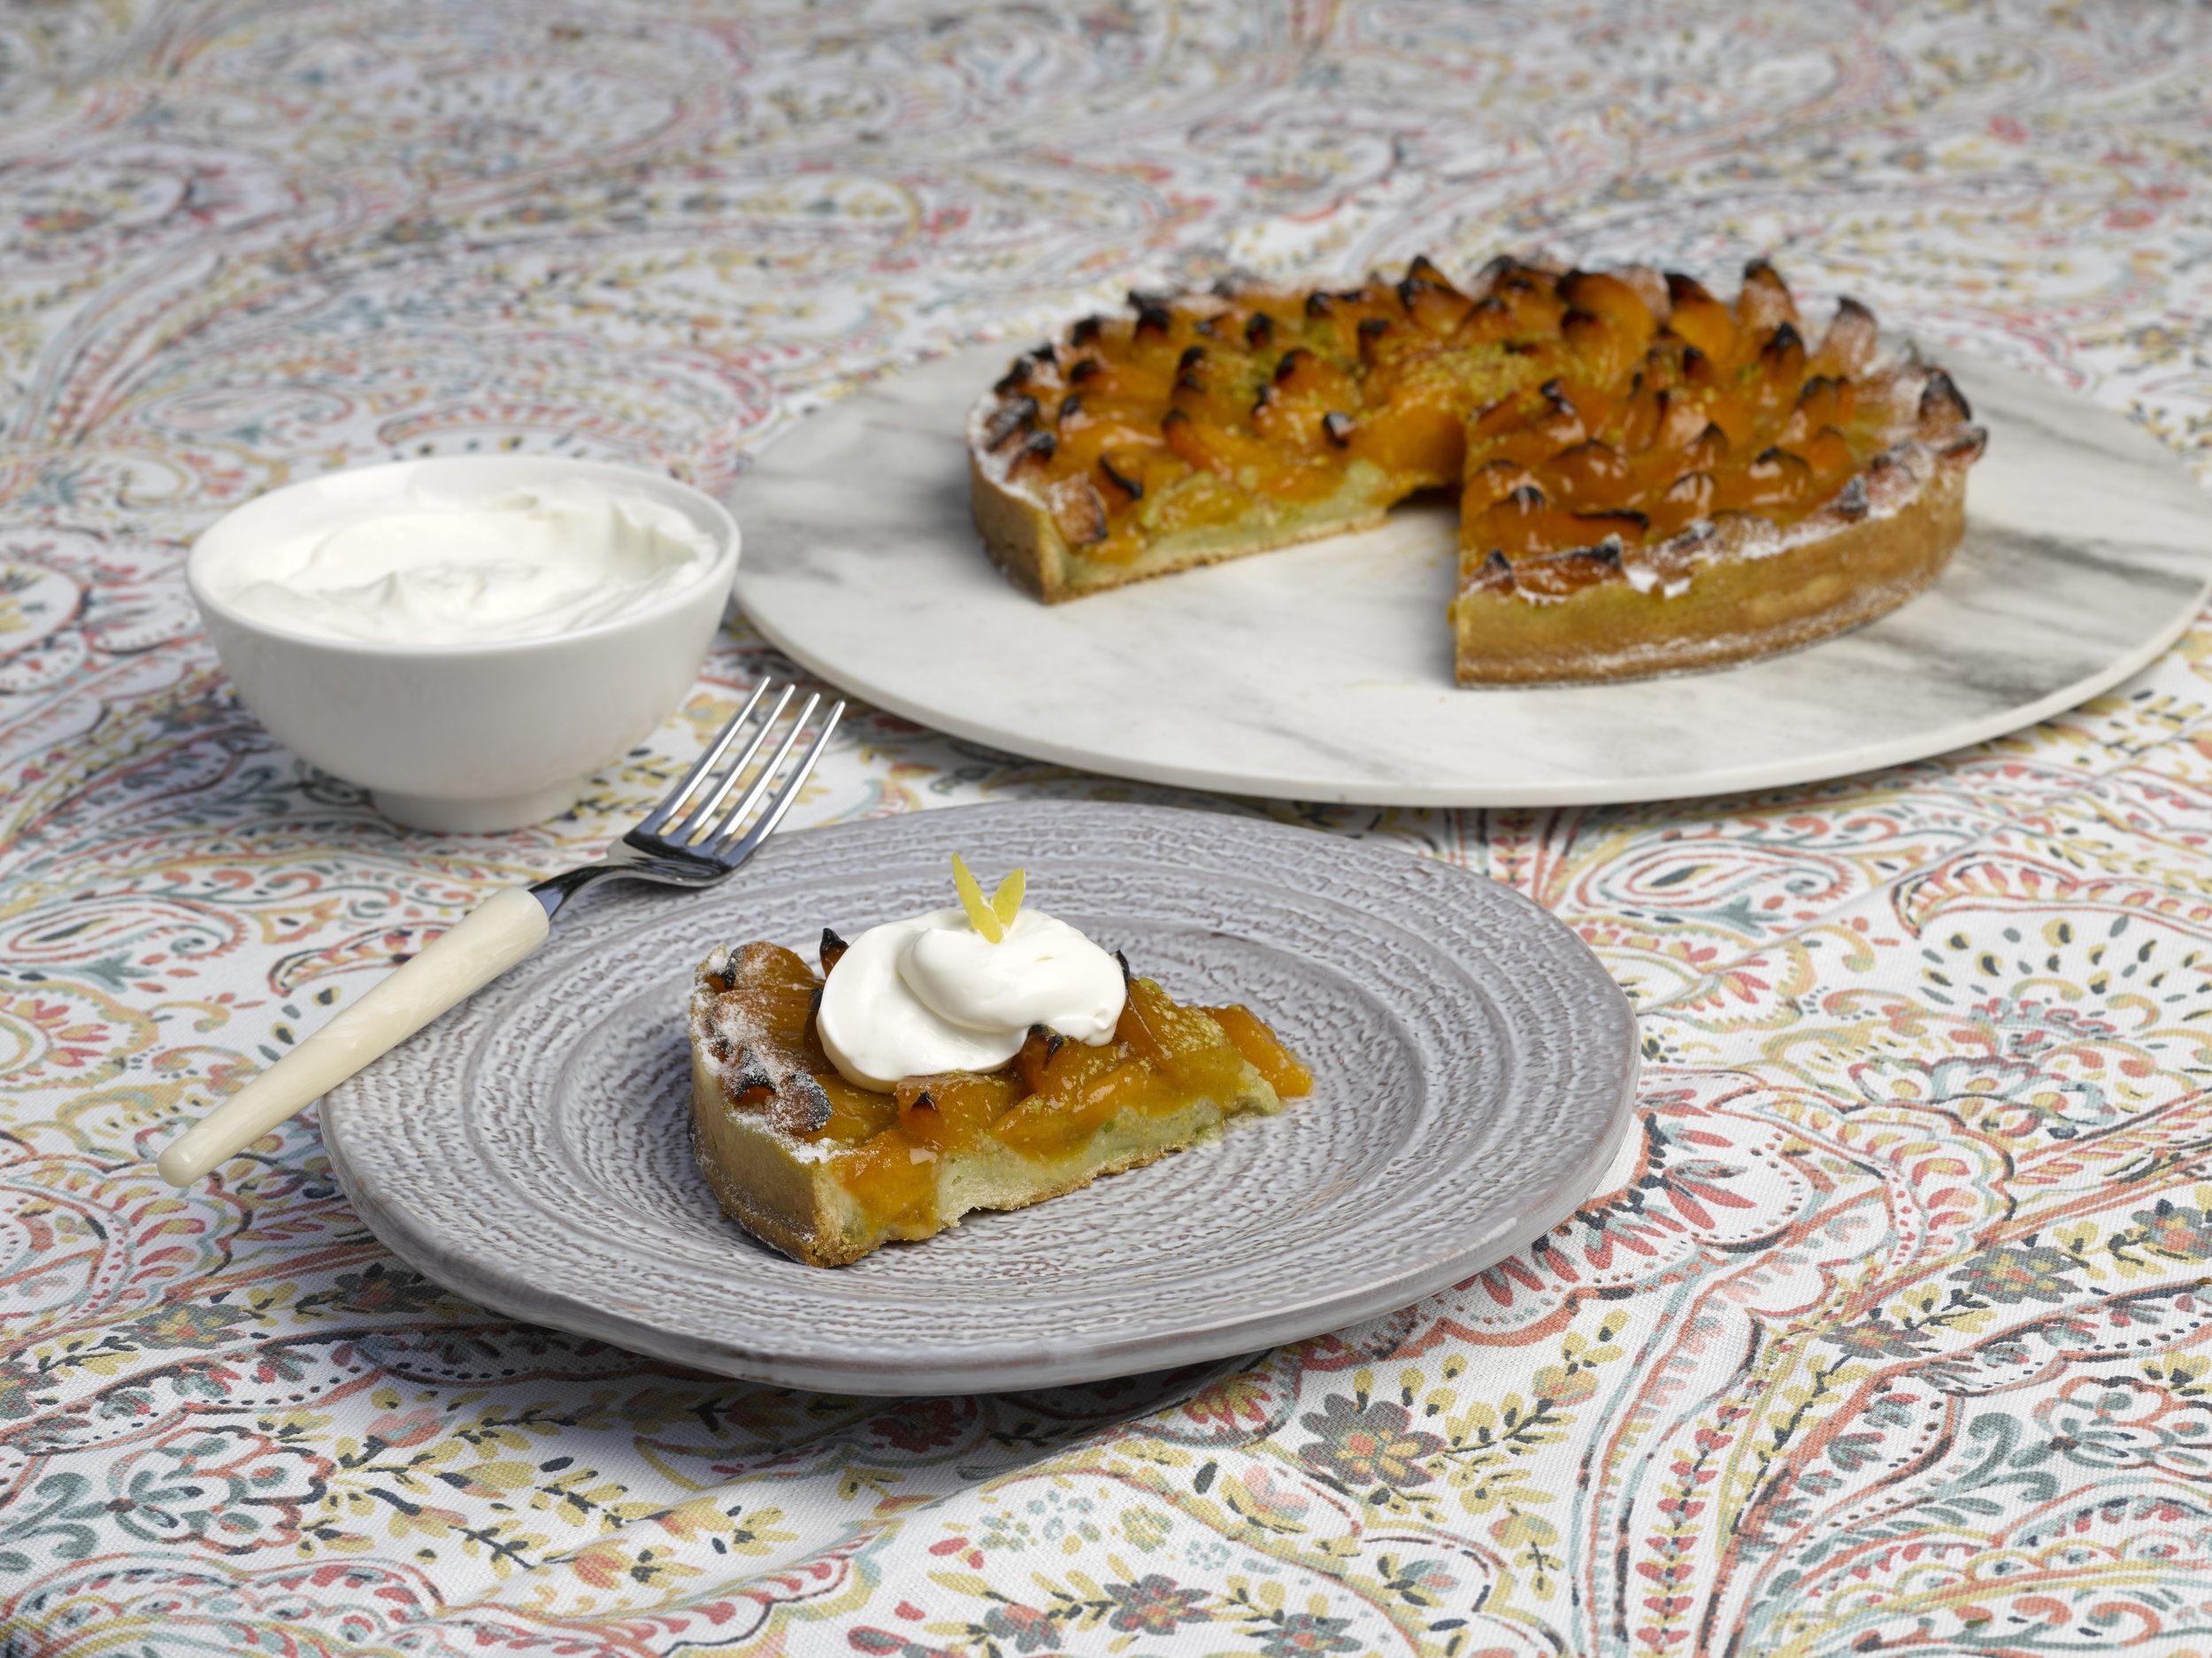
Fruit Tart Recipe
Now that the garden party is nearing its end, it is time to share this sweet treat to round out the experience. Get ready to satisfy your sweet tooth with a slice of paradise! 😋🌸🍰
The classic fruit tart is a true masterpiece. Picture this: a buttery crust, a luscious vanilla custard, and a vibrant array of fresh fruits that will have you dreaming of sunny days.
Join us as we dive into a world of flavours and take a bite of pure bliss. This is truly a garden party must! 🍓🍊
Ingredients
FRANGIPANE
½ cup butter
½ cup granulated sugar
3 eggs, divided
1 cup almond flour, divided
1 Tbsp all-purpose flour
1 tsp vanilla extract
½ tsp grated lemon zest
CRUST
1 (9-inch) frozen par-baked pie crust, thawed according to package directions
FILLING
2 cups thinly sliced stone fruit (pears, apricots, etc.)
¼ cup granulated sugar
½ cup melted butter
¼ cup crushed pistachios
Icing sugar, for serving 1 cup crème fraîche, optional
Method
FOR THE FRANGIPANE
- In a stand mixer fitted with the paddle attachment, beat the butter and sugar quickly until light and fluffy, about 4 minutes.
- Reduce the mixer speed to low. With the mixer running, add 1 egg and ⅓ cup of almond flour. Mix until thoroughly combined. Repeat twice until the eggs and all the almond flour are incorporated, scraping down the sides of the bowl between additions.
- Add the all-purpose flour, vanilla, and lemon zest. Mix on low speed just to combine, then set aside.
FOR THE CRUST AND FILLING
- Preheat the oven to 375°F.
- Bake the crust until it is lightly golden and the bottom is set, for 10 minutes.
- This will prevent the bottom from getting soggy.
- Fill the pie crust with room-temperature frangipane and spread it in an even layer.
- Combine the sliced stone fruit with the sugar in a large bowl, and leave to marinate for 5–10 minutes. Press the fruit into the frangipane, but make sure to leave some fruit poking through.
- Place the tart on a rimmed baking sheet to catch any spillage, and bake until the frangipane has risen and almost engulfed the fruit, about 40 minutes.
- The top of the frangipane should be slightly golden.
- Allow to cool completely, then brush with melted butter, dust with crushed pistachios and icing sugar, and serve with some crème fraîche on the side (if using).
Note
The frangipane can be made ahead and refrigerated in an airtight container up to 1 day in advance; bring it to room temperature before using.
Let's spread the joy of this dessert and make every garden gathering a truly scrumptious affair! 🌺🍰
Lemon Ricotta Pasta with Arugula Recipe
The mood has been set, and your guests are sipping cocktails. It is time to indulge in a burst of flavour that will transport them to a summer garden oasis! 🌿🍋
This Lemon Ricotta Pasta with Arugula is the ultimate main dish for your garden party extravaganza. With every twirl of the fork, you'll be whisked away to a Mediterranean paradise, where tangy lemon meets creamy ricotta, and peppery arugula adds a delightful kick. It is a quick and easy creamy lemony pasta ready in 20 minutes!
It is definitely a harmony of fresh ingredients that will leave your taste buds dancing! Join us as we serve the main attraction. Bon appétit! 🍽️🌼
Ingredients
Produce
2 cups Arugula
1 Basil
1 Chili flakes
1 tbsp Lemon, zest
3 cloves garlic, minced
Fresh basil leaves for garnish (optional)
Condiments
1/4 cup Lemon juice
Pasta & grains
1 lb Short pasta
Oils & vinegars
1 Olive oil
Dairy
1 cup Parmesan or pecorino
1 cup Whole-milk ricotta
Instructions:
- Cook the pasta according to package instructions until al dente. Drain and set aside.
- In a large skillet, heat olive oil over medium heat. Add minced garlic and sauté for about 1-2 minutes until fragrant.
- Add lemon zest and lemon juice to the skillet, stirring well to combine.
- Reduce the heat to low and add ricotta cheese to the skillet. Stir until the ricotta is heated through and well incorporated into the sauce. Season with salt and pepper to taste.
- Add the cooked pasta to the skillet, tossing gently to coat it with the lemon ricotta sauce.
- Stir in the fresh arugula and continue cooking for about 2-3 minutes until the arugula wilts slightly.
- Remove from heat and garnish with grated Parmesan cheese and fresh basil leaves, if desired.
- Serve immediately and enjoy the refreshing flavours of this lemony, creamy pasta dish!
Note: Feel free to customize the recipe by adding grilled chicken, cherry tomatoes, or roasted vegetables for extra variety and nutrition.
Ready to take your tastebuds on a journey? This one is too easy not to try!
The Perfect Lighting at a Garden Party
When it comes to hosting a delightful garden party, the perfect lighting can transform the ambiance into a whimsical wonderland!✨✨✨
Here are some easy tips & tricks to help bring that effortless glow to your evening!
💫 Twinkle lights: If your space allows it, drape soft, warm string lights delicately along branches or along your pergola to create the illusion of twinkling stars!
🕯️ Candles: Scatter an assortment of elegant candle holders throughout the space and table, allowing the flickering flames to dance in various corners of your garden, adding an intimate and romantic touch to the evening.
🌟 Lanterns: Dotting the pathways and hanging or standing lanterns in strategic spots helps guide your guests to the main entertaining area.
🌺 Floral Glow: Incorporate floral arrangements with petite fairy lights intertwined, bringing a touch of whimsy to your tablescape. The soft glow will highlight the beauty of the blooms, creating a stunning centrepiece.
🌿 Nature's Spotlight: For daytime parties, don't forget to utilize the natural beauty of your surroundings! Position your gathering in an area where the foliage gently filters the sunlight during the day, creating a soft and dreamy atmosphere.
Did we miss anything? Share your garden party lighting ideas in the comments below! 🌷🌳💫
Be sure to check us out on Instagram @sebandsheila!
The Garden Party Essentials - Amazon Storefront
This month, we've been talking about throwing the best garden party, and this thoughtfully curated collection brings together everything you need to create a magical outdoor ambiance.😎☀️
From elegant string lights and beautiful flower arrangements to comfortable seating and charming tableware, these handpicked essentials will transform your garden into a picturesque setting for unforgettable gatherings.
Whether you're planning an intimate brunch or a lively evening soiree, let "The Garden Party Essentials" set the stage for an enchanting celebration. Get ready to create cherished memories amidst nature's beauty.
Shop directly through the LINK!
Be sure to check us out on Instagram @sebandsheila!
Campari + Soda Cocktail Recipe
For our garden party, we like to offer beverages that are a bit lighter and brighter than we would typically serve at lunch or dinner. Whether it’s mixed into a cocktail or served on ice, Campari + Soda is one of the most sophisticated summer cocktails🍹✨.
This classic aperitif is the perfect balance of bitter and bubbly, guaranteed to elevate your taste buds to new heights. The Campari + Soda is crisp and tart, making it ideal for a summer evening. This timeless summer cocktail is easy to mix and will appeal to a wide variety of guests. We like to use a short rock glass for the Campari + Soda.
Though we prefer sticking to cocktails for the duration of this dinner, it’s never a bad idea to have a bottle or two of wine chilling nearby. A light, crispy pinot grigio tends to do the trick and will pair beautifully with each course. So join us on this journey of tantalizing flavours, refreshing sips, and warm summer nights!
-
CAMPARI + SODA yield: makes 1 cocktail • prep time: 5 minutes
Ingredients
2 oz Campari
Soda water
1 orange slice
Method
Add the Campari to a short rock glass filled with ice. Fill to the top with soda water and garnish with the orange.
Cheers to Campari + Soda! 🥂🍊
Be sure to check us out on Instagram @sebandsheila!
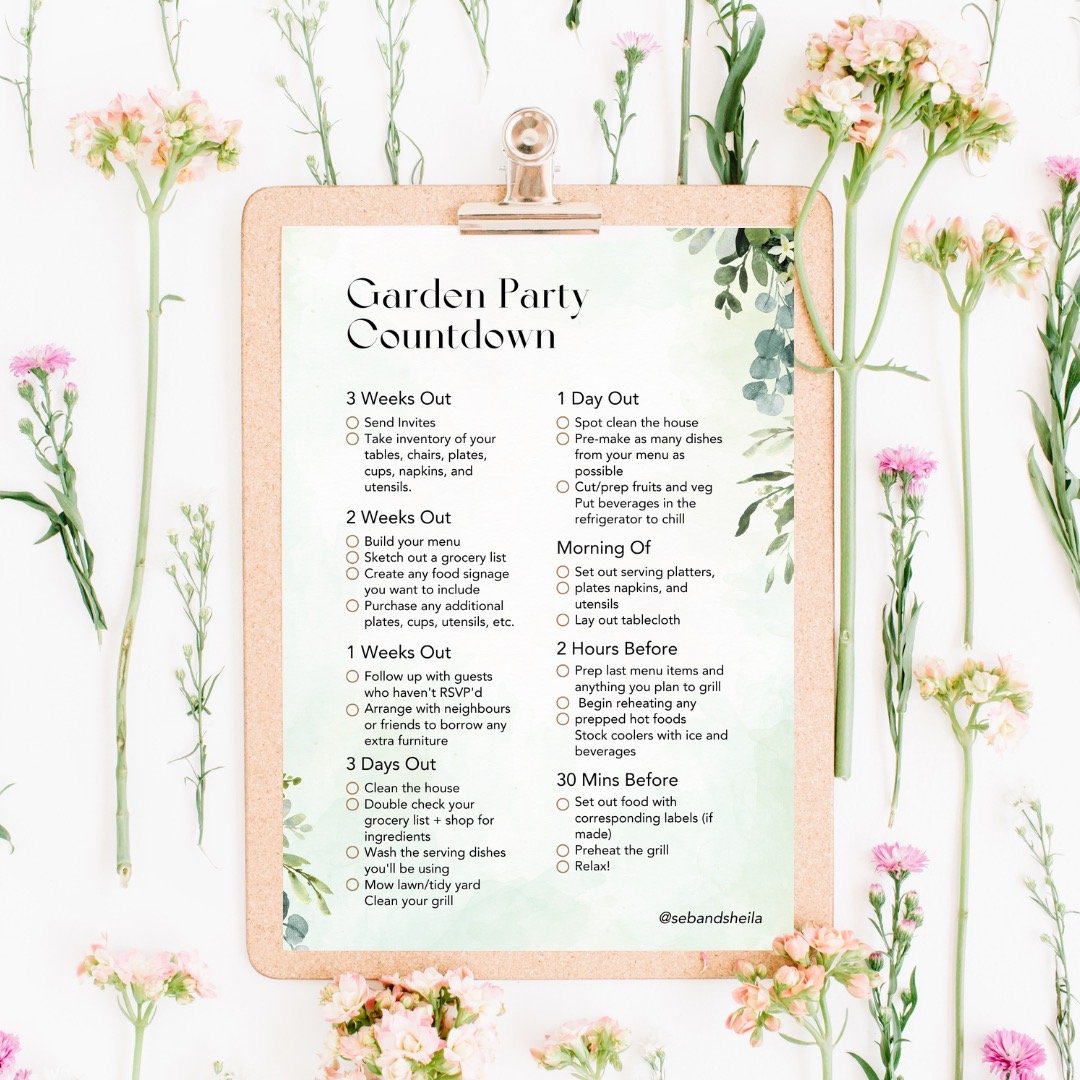
Garden Party Countdown Checklist
Any well-executed party comes down to the prep work, so we dedicated a lot of time to ensuring that our guide to entertaining, Eatertainment, includes sections to help take the guesswork out of prepping. We call them 'Party Countdowns'. These sections start each of the chapters and outline everything you need to do 1 week out, a few days out, the day before, etc.
So today, as we continue to dive into our Garden Party theme, it's all about the countdown. Summer cookouts are a time-honoured tradition, perfect for sipping refreshing drinks, sharing hearty laughs, and savouring mouth-watering dishes that taste better outdoors. To ensure a stress-free party, we've got you covered with our comprehensive Garden Party Countdown, designed to guarantee you don't miss a beat - available for download through the LINK!
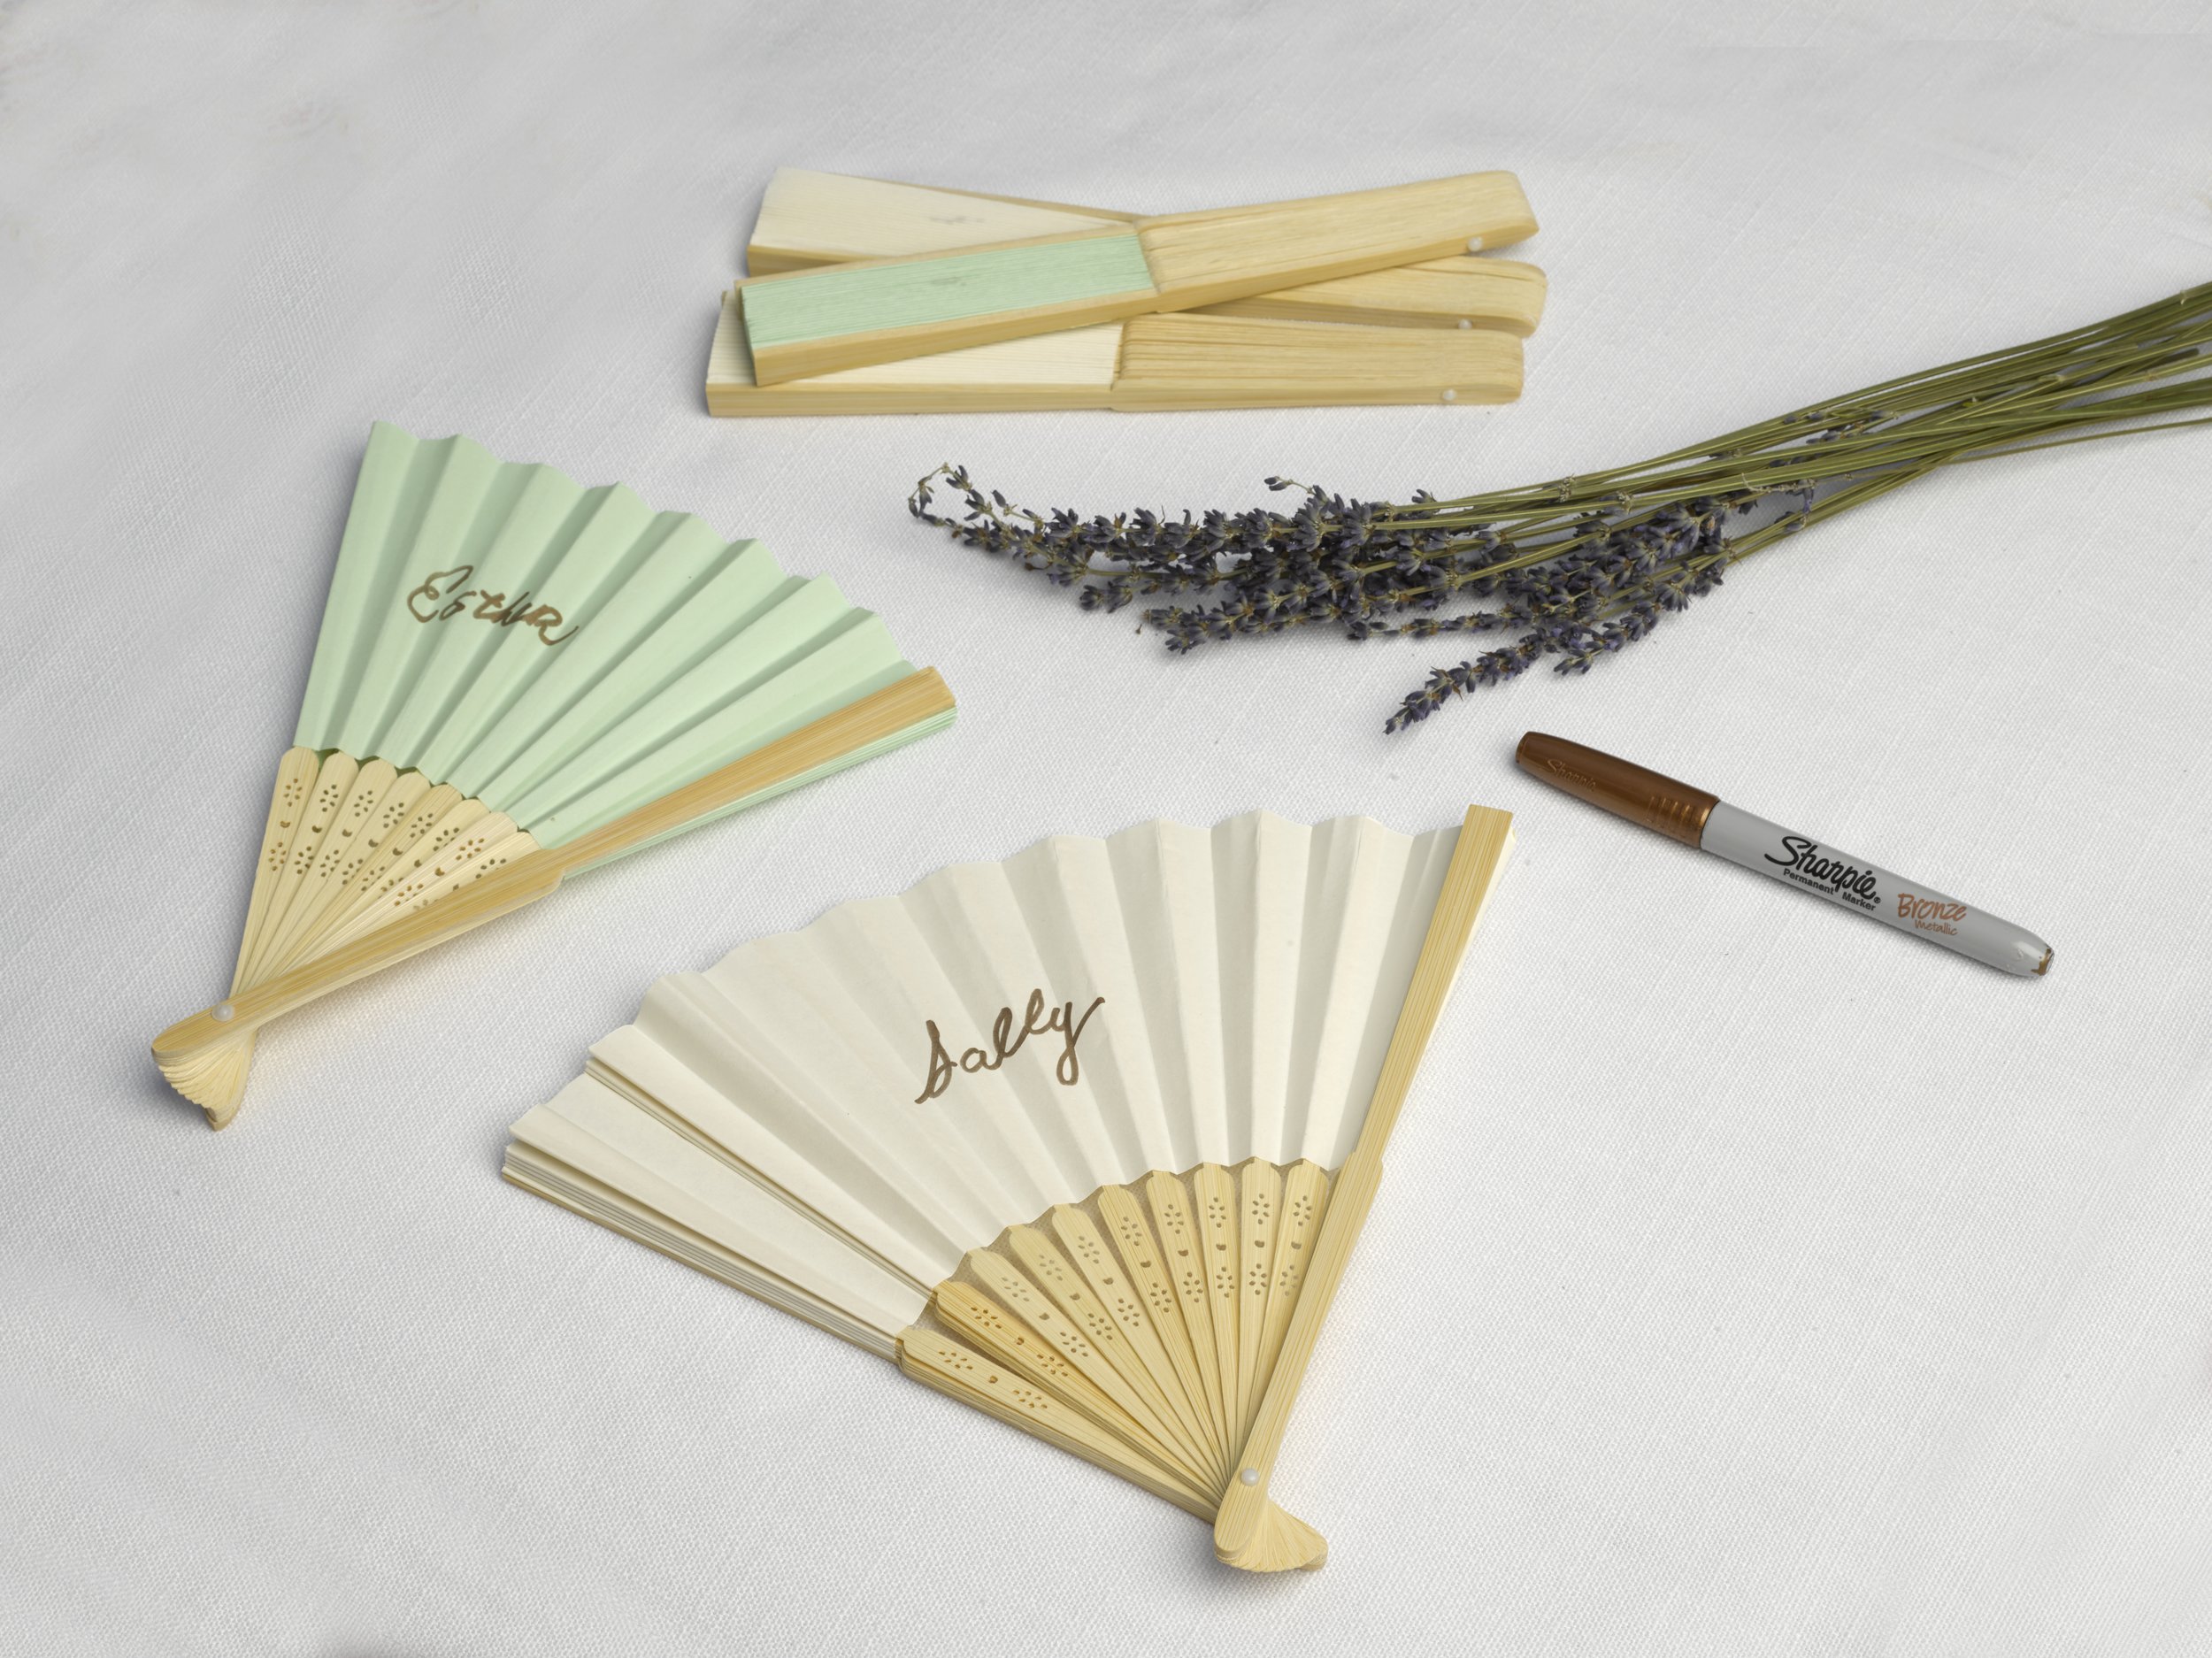
DIY Paper Fan Table Setting Decor
A table decor element that will help guests keep cool as well? This has to be the perfect name card for your summer entertaining ahead 🌟🌟🌟
With just a few simple materials, you can create a beautiful and unique fan name card that will wow your guests, and we are here to show you how it’s done! So grab your materials and let’s get creative. 🤩
Materials
Paper Fans
Sharpie bronze marker
Instructions
Step 1: Grab some colourful paper or cardstock fans.
Step 2: Spread the width of the fan to give you a flat surface
Step 3: Grab some Sharpie bronze markers and write the names of each guest attending
Step 4: Add some finishing touches, like glitter or floral accents, and voila! You’ve got a stunning centerpiece that’s sure to make a statement.
Whether you’re hosting a formal dinner party or family style garden party, this DIY fan idea is a fun and easy way to elevate your table setting. So what are you waiting for? Let’s fan-tasize! 💃🏻💃🏻💃🏻
Prosciutto with Melon Florets Recipe
The first thing to remember about curating a garden party menu is diversity.
Picture a vast table full of friends and family, everyone carrying massive plates and pouring themselves their favourite delicacies. Not every item will appeal to everyone, but a family-style platter supper allows everyone to eat more of what they like while avoiding what they don't.
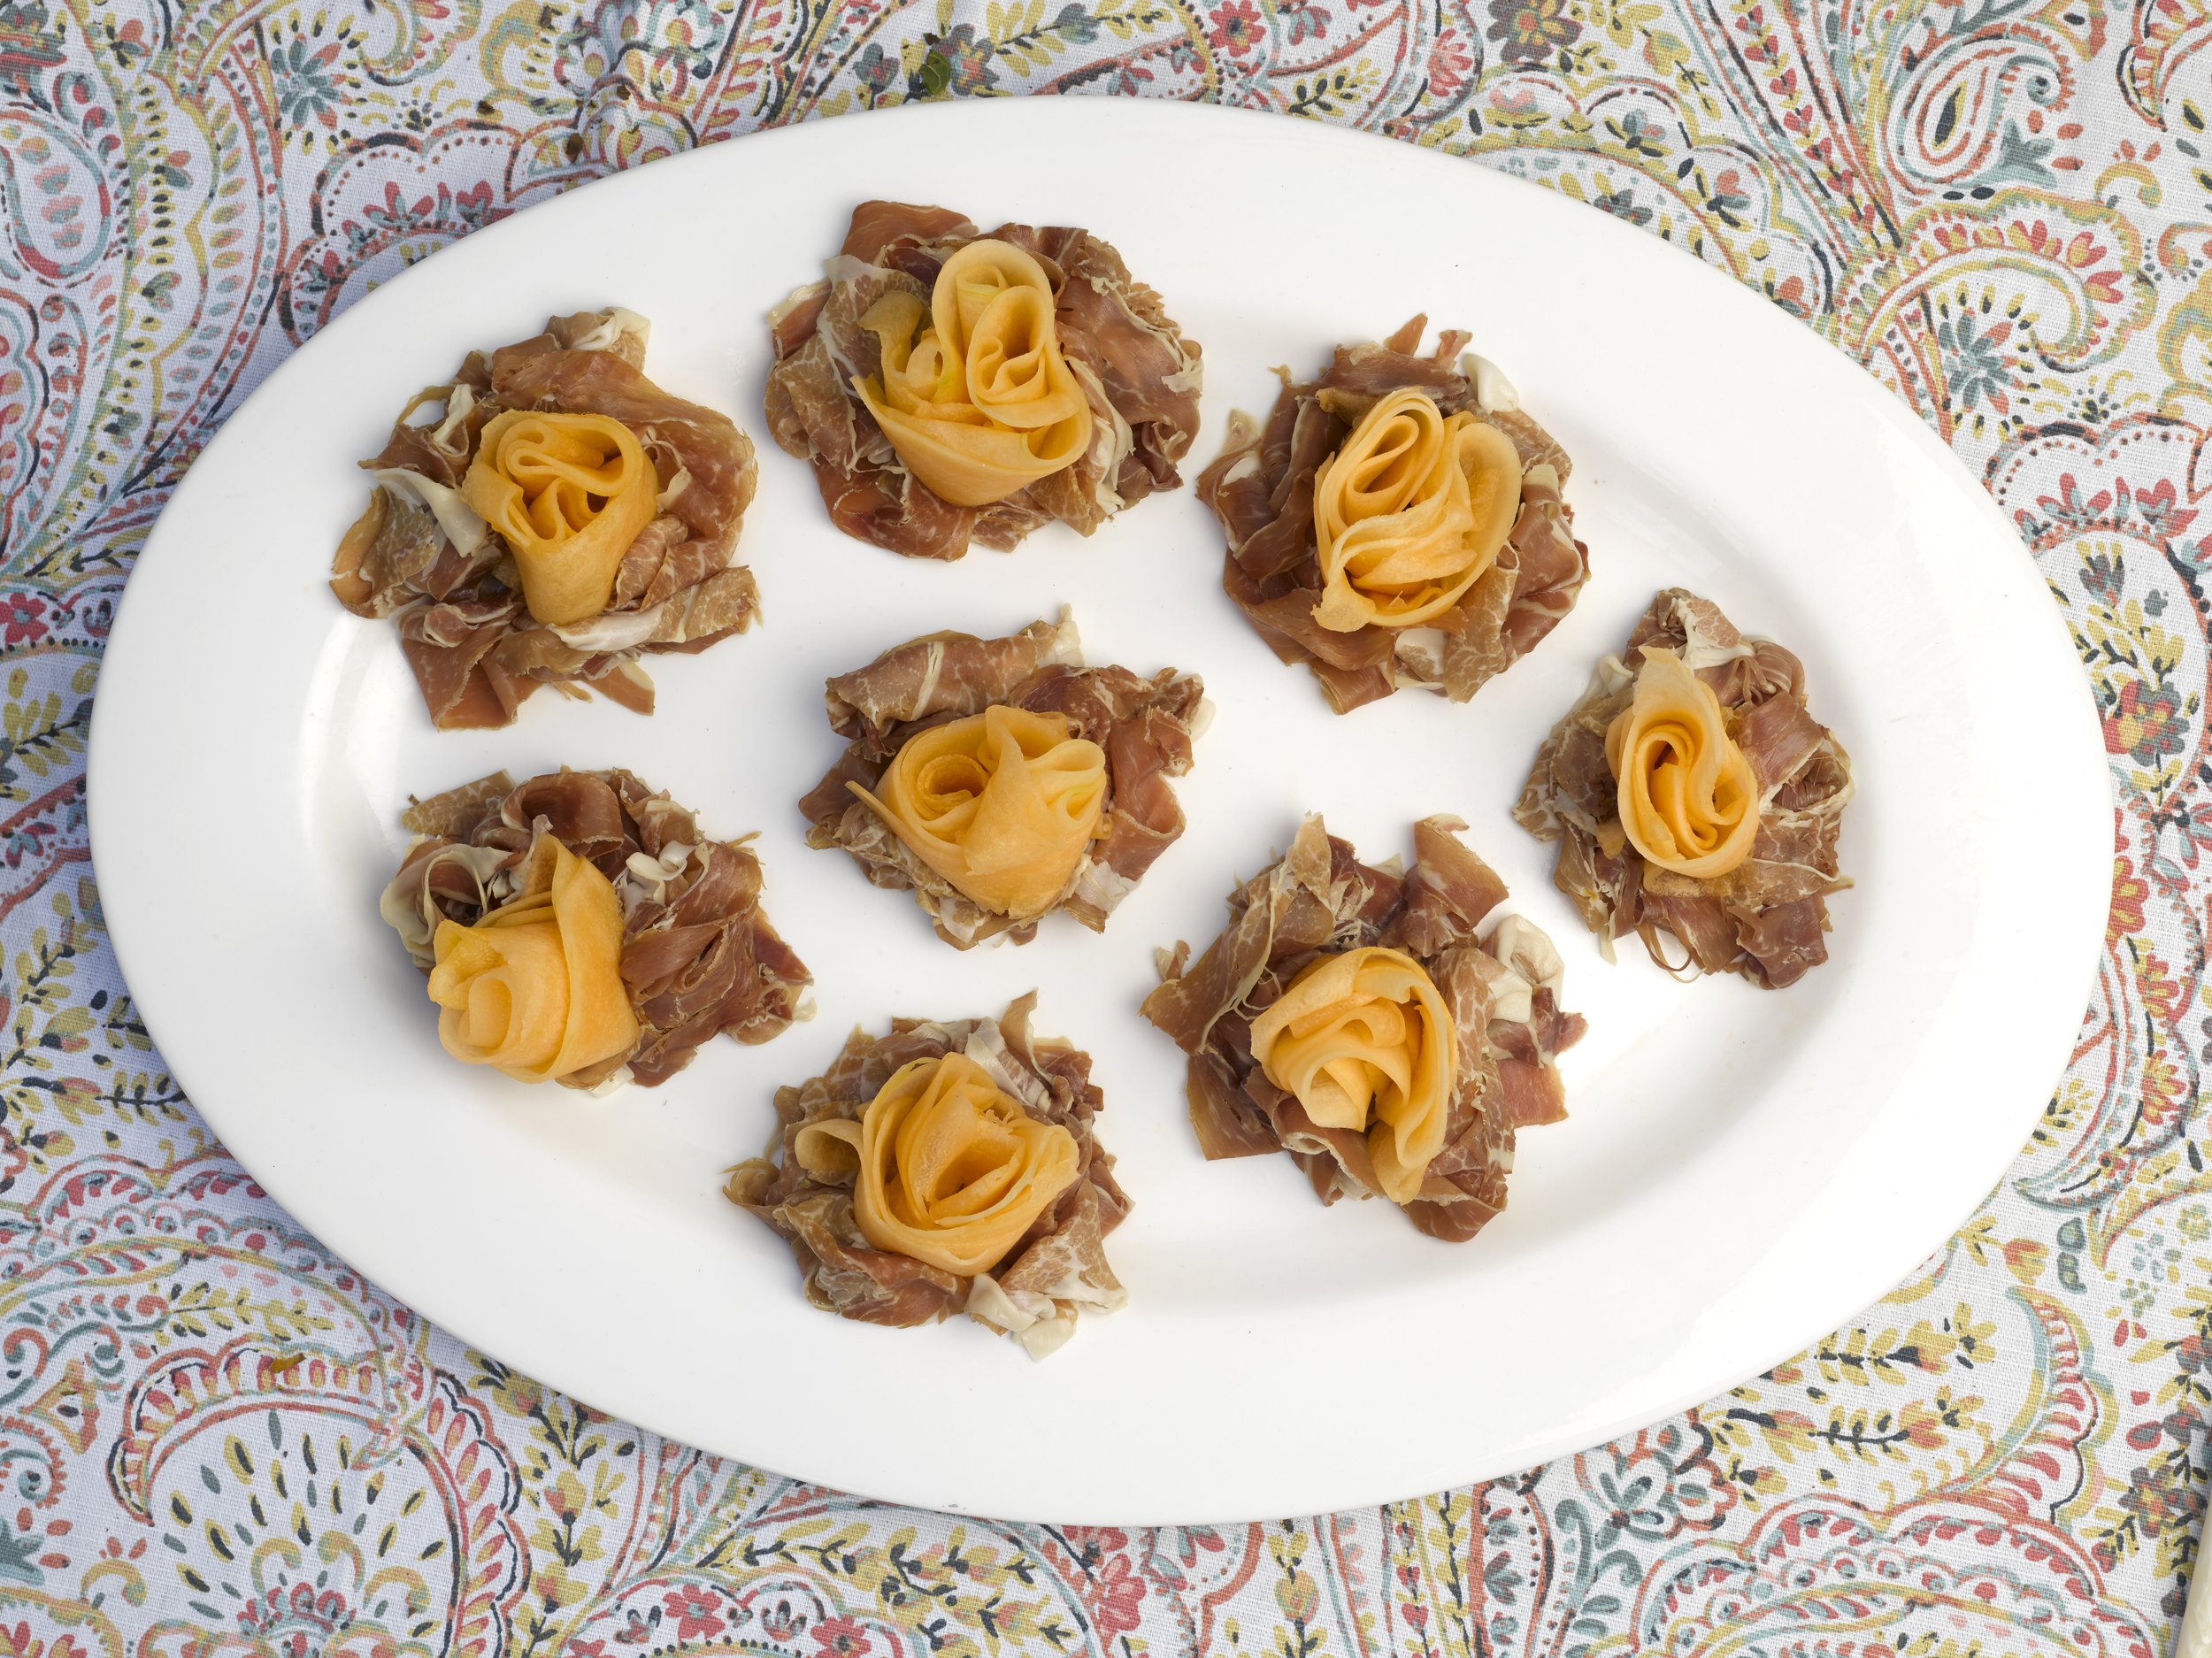
Rather than traditional canapés, we start our party with the ultimate shared European starter: Prosciutto with Melon Florets.
It's quick, easy, and a popular dish in Mediterranean restaurants. There are a few ways to present them together. While a slice of prosciutto wrapped around a wedge of melon is more common, we like the elegant look of ultra-thinly sliced prosciutto and shaved melon ribbons presented on a platter in small bunches or florets.
Don't believe us? Try it for yourself!
-
Ingredients:
2 large cantaloupes
24 slices of thinly sliced prosciutto
Method
1. Cut the cantaloupe in half, peel the skin, and remove the seeds. Cut each half in half again. Shave each piece into long, thin slices using a mandolin or a vegetable peeler.
2. Make piles of prosciutto on a large serving platter, about 3 pieces per mound. Pinch together a small bunch of cantaloupe ribbons and place them on top of the prosciutto, creating florets. Serve immediately.
Now that you've got your menu all laid out, all there's left to do is get the party started!
Dinner Series Playlist - 7th Volume
The month of May is the perfect time for hosting garden parties, especially with the sunny weather and rising temperatures. And what's a good party without great music? ☀️🎶
Time to put your dancing shoes on ... again!!!! We're excited to finally launch the 7th volume of our dinner series playlist, bringing together some brand new music (hot off Sheila's list) and some classic favourites with a remix twist. Crack open a bottle of rosé and enjoy these rhythms. We bet you can’t keep yourself from dancing! 😏
Click the LINK to check out this playlist. 🎵
Happy Hosting... and dancing!! Be sure to check us out on Instagram @sebandsheila!
Sally's Famously Spicy and Chewy Ginger Cookies Recipe
Now that the brunch party is nearing its end, it is time to share this sweet treat to round out the experience.😋
If you're a fan of ginger and a little bit of spice in your dessert, you'll want to save this one! Sally's famously spicy and chewy ginger cookies are a must-try for anyone who loves a flavorful cookie with a bit of a kick. 🍪 They are the perfect addition to your next brunch spread.
Pro tip: warm these cookies up in the oven or microwave for an extra gooey center that will make your guests' taste buds sing with joy.
-
Ingredients
2½ cups all-purpose flour
2¼ tsp baking soda
½ tsp. table salt
1 Tbsp ground ginger
½ tsp. black pepper
½ tsp ground allspice
¼ tsp. ground cinnamon
¼ tsp. ground cloves
¼ tsp. ground nutmeg
¾ cup butter
½ cup granulated sugar, plus extra for rolling ½ cup packed brown sugar 1 large egg
1 Tbsp freshly grated ginger
¼ cup dark molasses
1 Tbsp coarse sea salt
Method
1. Mix the flour, baking soda, and salt in a medium bowl. Mix in the ginger, pepper, allspice, cinnamon, cloves, and nutmeg. Set aside.
2. In a stand mixer fitted with the paddle attachment, beat the butter on high speed with both sugars, the egg, and fresh ginger until light and fluffy, 4-5 minutes.
3. Turn the mixer to low speed. Slowly add the molasses, then the flour mixture, and mix until fully combined.
4. Roll the dough into a single large ball, then wrap it in plastic wrap and freeze for at least 30 minutes, or preferably overnight.
5. Preheat the oven to 350°F. Line two baking sheets with parchment paper.
6. Remove the dough ball from the freezer and allow it to soften slightly for about 15 minutes. Pour some more granulated sugar into a small bowl. Divide the dough into 18 evenly sized balls, wet your hands, and roll each ball in the sugar. Work quickly, as the dough needs to remain chilled.
7. Place the balls about 4 inches apart on the baking sheets and sprinkle each one with a pinch of sea salt.
8. Place one baking sheet on the top rack of your oven and the other on the bottom rack, and bake the cookies for 6–8 minutes. Rotate the sheets and bake until brown, 6–8 minutes.
9. Place the cookies on a wire rack to cool for 20 minutes, then transfer them to an airtight container for up to 5 days (although they are so good, they won't last that long).
Note: The dough can be rolled into balls and frozen, so you can bake up some of these ginger delights whenever the urge strikes!
Treat yourself and your guests to a treat that will leave everyone craving more! 🍪😍
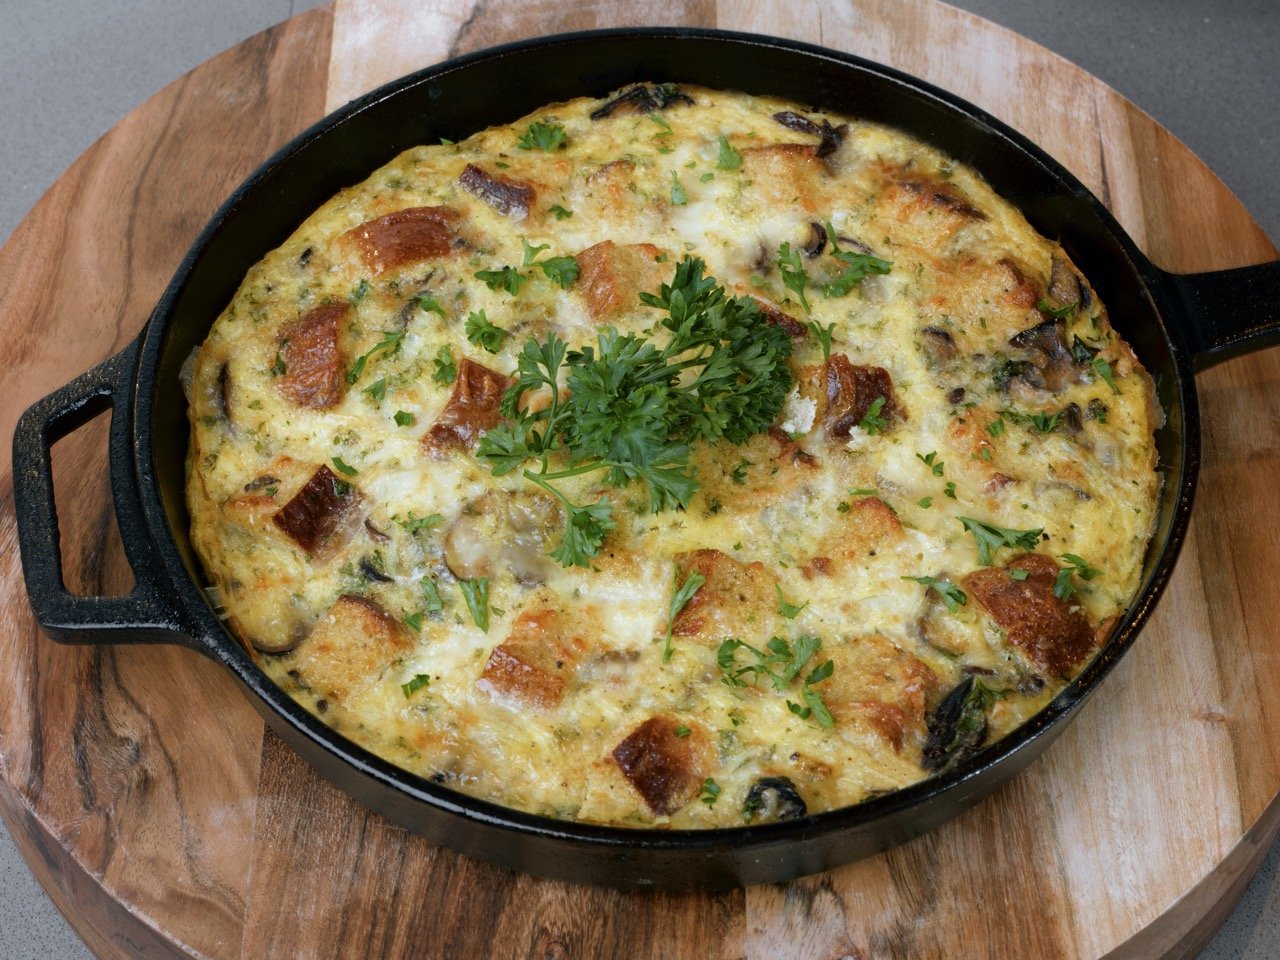
Leek and Mushroom Frittata Recipe
Every brunch party deserves a main attraction!
This classic dish has a delicious twist with sautéed leeks, mushrooms, and melty cheese, baked to golden perfection. It's the leek and mushroom frittata! Plus, we've got a quiche variation for those who want to switch things up. We recommend adding some pieces of cubed bread to your frittata to provide a nice texture and add some extra substance to the dish.
Fun fact: If you are looking for a healthier cheese option, goat cheese can be used. It is low in calories and has a tangy and slightly sweet flavour that pairs well with a variety of ingredients in this dish.
Ingredients
2 Tbsp. butter
1 leek, white and light green parts only, chopped
12 oz. sliced cremini and/or oyster mushrooms
Sea salt and black pepper
10 eggs
2 cups shredded Gruyère cheese + extra for sprinkling
¼ cup curly parsley
1½ cups crème fraîche
8-10 cubes of crusty bread, such as sourdough, are optional.
1 (12-inch) frozen pie crust, thawed, for quiche variation
Method
1. Preheat the oven to 350°F.
2. Heat the butter in a large ovenproof skillet over medium; next, add the leek and cook until soft, about 10 minutes. Add the mushrooms with salt and pepper to taste. Cook until the mushrooms are soft, for about 8 minutes.
3. In a separate bowl, whisk the eggs with the gruyère, parsley, creme fraiche, and a healthy pinch of salt and pepper. Pour this egg mixture over the mushrooms.
4. Add the cubed bread (if using).
5. Sprinkle with more gruyere and place in the oven until the center is cooked through, about 20 minutes.
6. For the quiche variation, omit the cubed bread but prepare all the other ingredients in the same way. Pour the egg mixture into the pie crust and bake according to the package instructions. Generally, a quiche this size should take 45 minutes to bake, but watch for it to be fully set and test it by inserting a knife into the center of the quiche. If it comes out clean, it's cooked through.
Ready to take your tastebuds on a journey? This one is too easy not to try!
Spring Brunch Floral Arrangements
Ready to have the perfect spring brunch floral arrangements? 🌸🍴
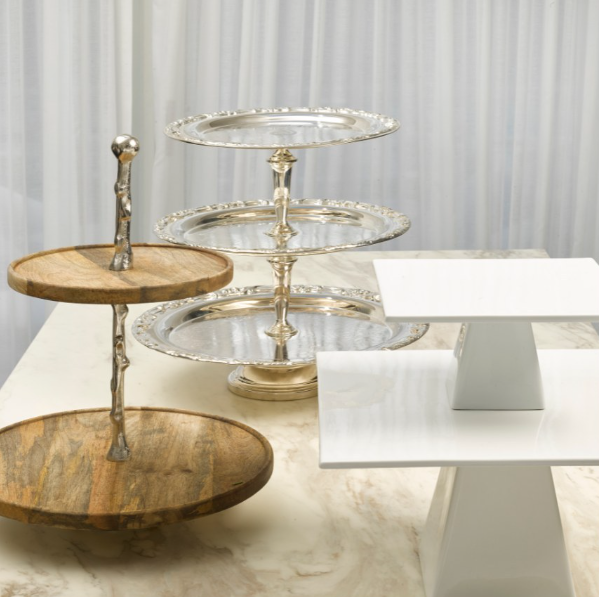
This is how you elevate your table decor, and all it takes is an easy DIY cake stand floral arrangement! All you need is a cake stand, fresh flowers, and some creativity!
Remember, there are no hard-and-fast rules when it comes to floral arrangements. The key is to have fun, get creative, and create a beautiful and unique centerpiece that adds to the overall ambiance of your event. 💐
Materials:
Cake Stand
Instant Aquafoam Brick
Floral Clippers/Scissors
Tape
Directions:
Step 1: Gather your favourite elements: flowers, branches, leaves, and greens.
Step 2: Tape the water-soaked Aquafoam to the stand.
Step 3: Add your greenery to make a foundation. It looks natural for some of the cascading greenery to drape off of the vessel in places and stand tall in other places.
Step 4: Next, add large, lush blooms (peonies and garden roses work well) low and close to the center of the stand.
Step 5: Add longer-stemmed blooms of all textures, heights, and sizes to float above the greenery and low, round flowers. Place them in the flow and direction of your greenery, and let them move about the place.
Feeling inspired? Share your DIY table floral arrangements with us by tagging us.
A Brunch Party with Kids - Watermelon Pizza and Kids Cocktail
Regarding brunch, we believe in the adage “the more, the merrier.” Brunch is the best time to host people of all ages and interests, so we advise having a food and drink menu for the younger audience.
This healthy snack pairs effortlessly with a kid’s cocktail and is perfect for hosting kids at a spring brunch party! The Watermelon “Pizza” is the tastiest way to incorporate yogurt and fruit into your kids’ menu while keeping it fun! 🍉🍹
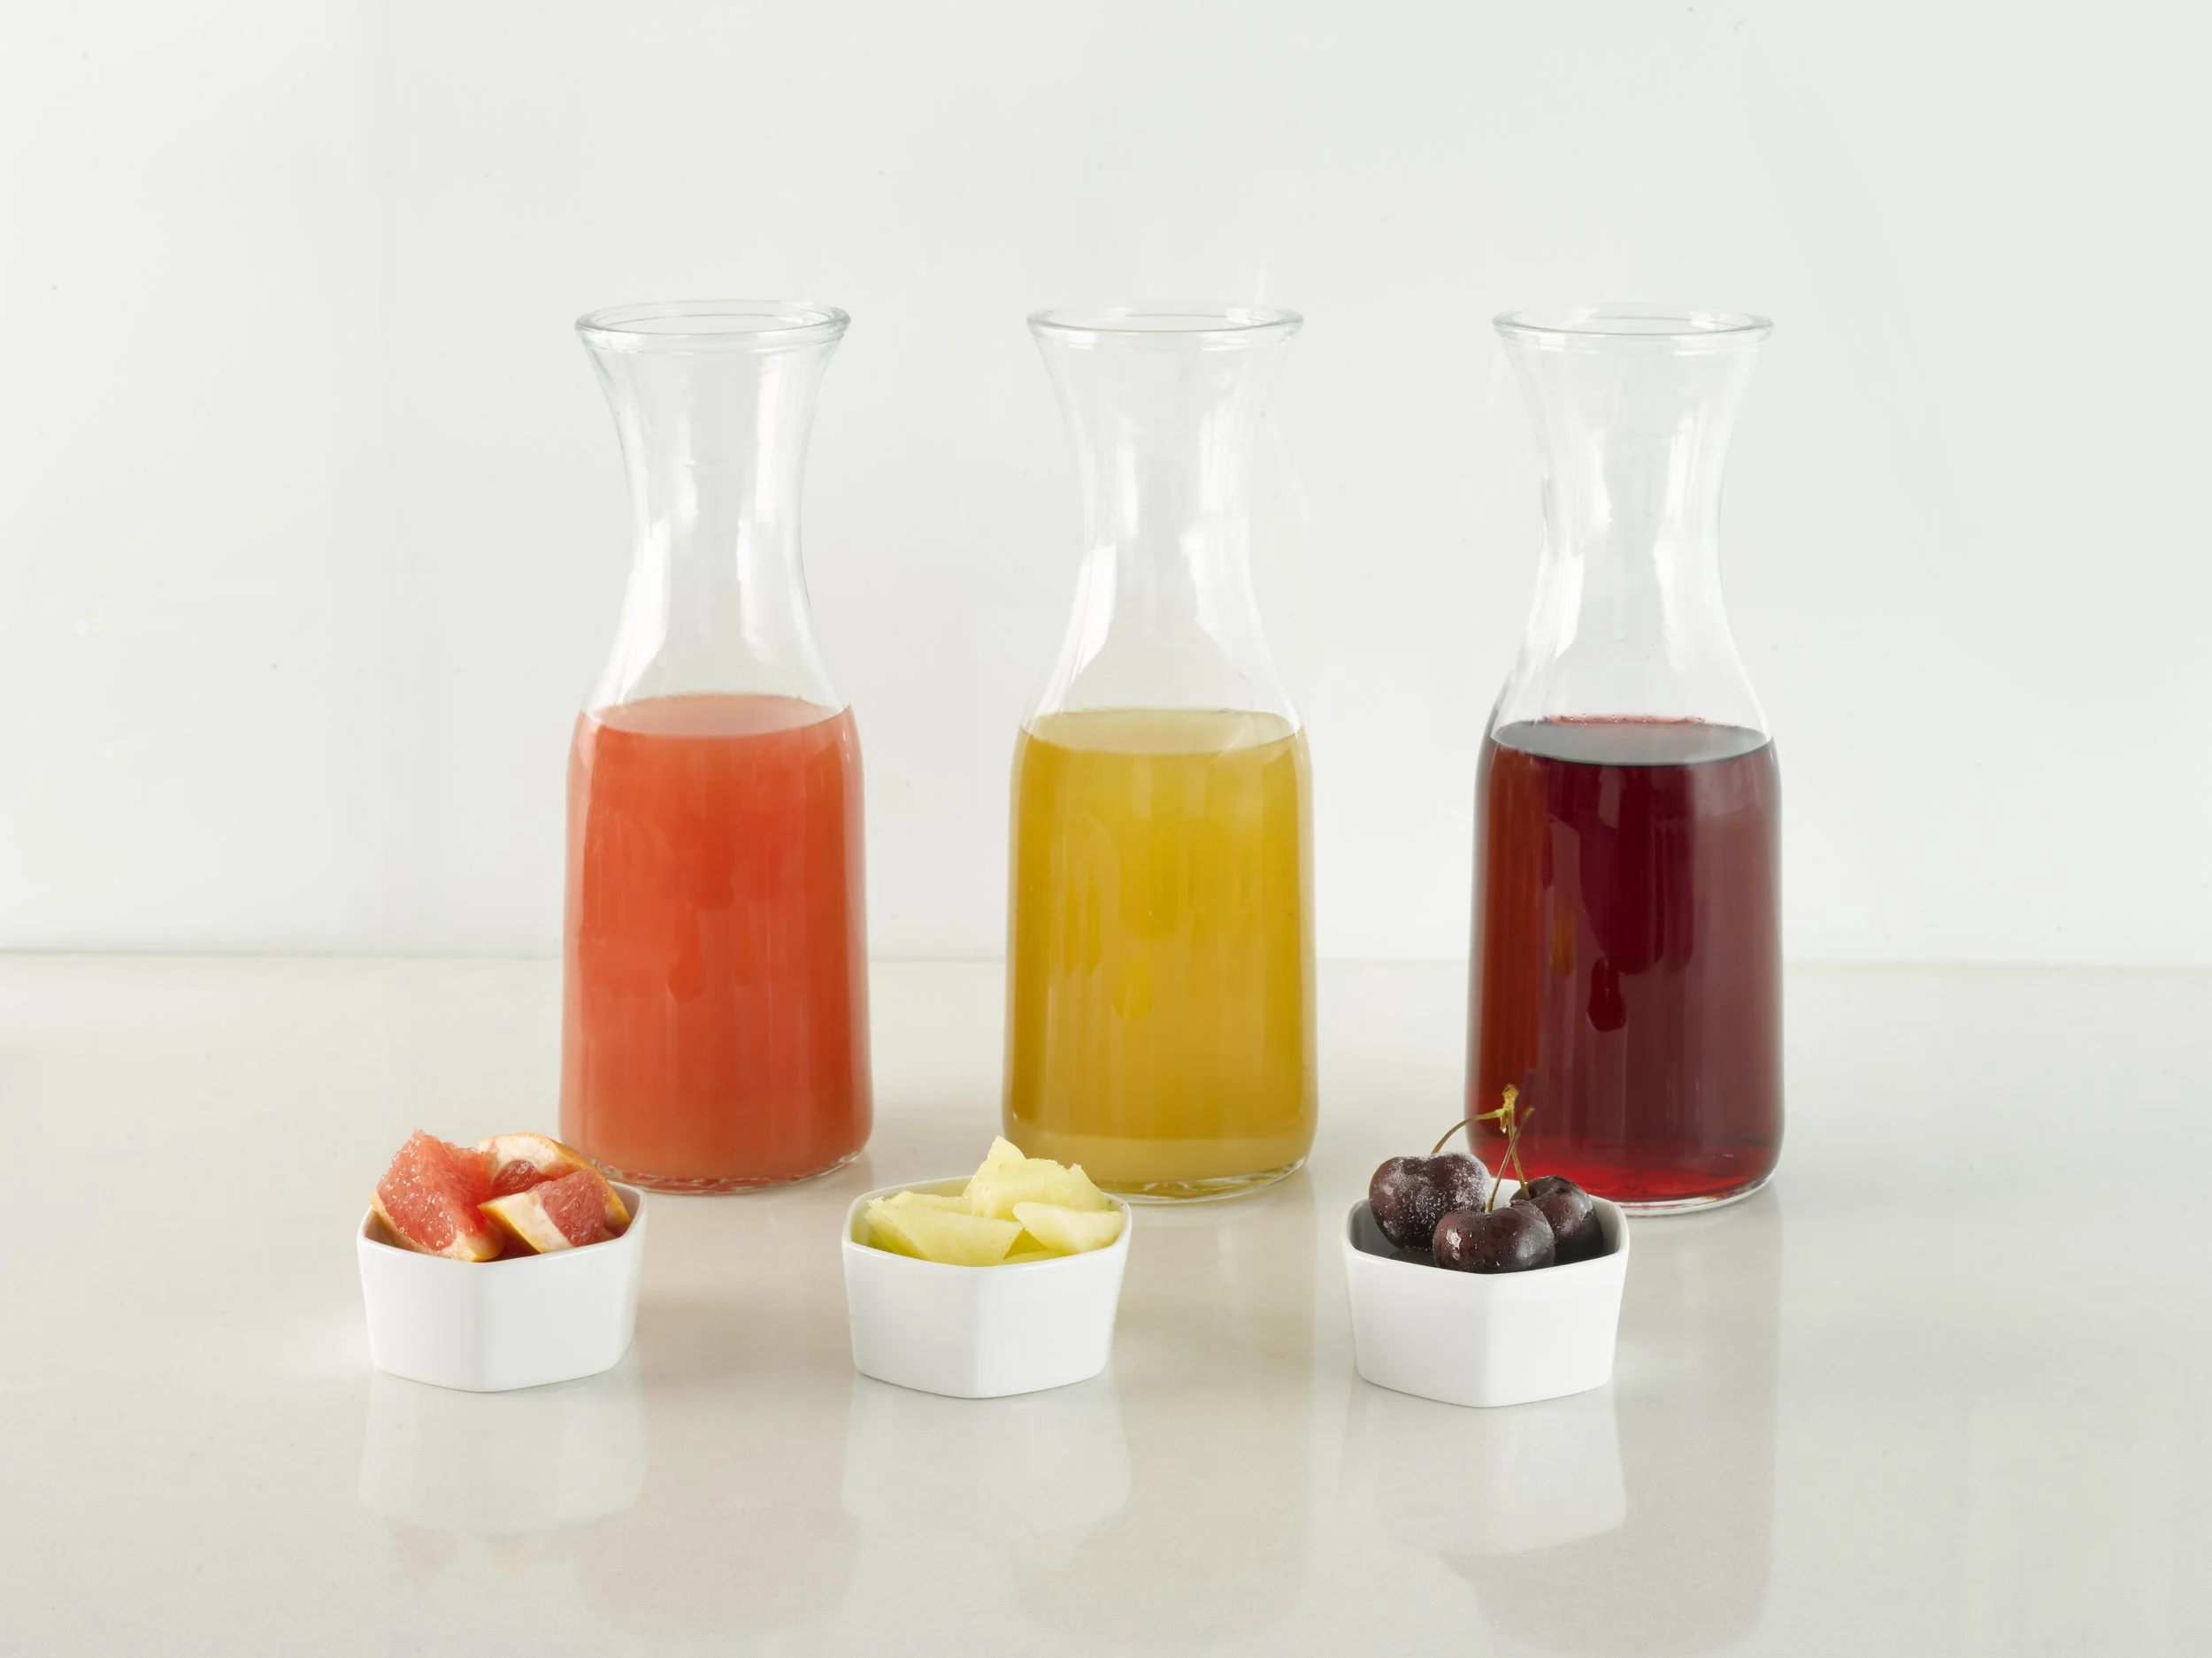
For your brunch party, we suggest putting out carafes of fresh juice with matching frozen garnishes; typically, we offer pink grapefruit, pineapple, and cranberry juices, but use whatever your guests are likely to enjoy. We also like to put out flavour-infused sparkling water. Any sparkling water works, but we recommend sugar-free options.
Watermelon “Pizza”
yield: serves 6 - prep time: 10 minutes
Ingredients
1 small watermelon
½ cup vanilla Greek yogurt
6 gooseberries, leaves removed
6 large blueberries
6 blackberries
3 Tbsp pomegranate seeds
Method
Cut the watermelon at the center into a 2-inch-thick disk
Place the watermelon disk on a cutting board and cut across it to make 6 slices. Spread the yogurt onto each slice and top with gooseberries, blueberries, blackberries, and pomegranate seeds. Serve immediately.
Kid’s Cocktail
yield: makes 1 cocktail • prep time: 2 minutes
Ingredients
¼ cup soda water
%, cup pink grapefruit, pineapple, cranberry juice
Method
Combine the juice and soda water in a kid-friendly cup and serve!
Ready to entertain your little guests? Share your own kid-friendly food and drink ideas in the comment section below!
Be sure to check us out on Instagram @sebandsheila!
Pink Lemonade Rosé Cocktail Recipe
Spring cocktail sipping just got a whole lot better with our Pink Lemonade Rosé cocktail recipe! 🍹🌞
Bursting with sweet, tart, and refreshing flavours, this cocktail is a crowd-pleaser that will make you the star of any gathering! It is the perfect addition to your next brunch event! 🍋🍓🍷
This is the best cocktail, but don’t just take our word for it; try the recipe and let your taste buds do the talking!
Ingredients (4-6 Servings)
1 bottle of frozen pink lemonade
1 bottle of pale rosé
1 bottle of sparkling water
2 - 6 slices of lemon
1 small tin pink sugar sprinkles
Edible glitter
Edible flowers, optional
Method
- Place the frozen lemonade in a punch bowl.
- Add the wine and half a bottle of sparkling water.
- Add some edible rose gold glitter
- Set aside lemon slices for garnish.
- Just before your guests arrive, add the remaining sparkling water to the punch bowl and fill it with ice.
- Stir well and add the remaining lemon slices.
- To assemble, place the rim of a glass in the lemon juice and then roll in the sugar to coat.
- Pour the lemonade into the sugar-coated glass and garnish with a lemon slice and edible flowers (if using).
Cheers to the warmer days and good times! 🥂 Be sure to check us out on Instagram @sebandsheila!
Tips on How to Set Your Table for a Spring Brunch
Spring is an excellent time to set up a brunch tablescape and enjoy intimate meals with family and friends! While brunch is generally a more casual setting, we enjoy putting a little extra effort into the tablescape, which is incredibly simple.
Here are our top tips for incorporating the best of spring into your tablescape for a colorful and beautiful brunch!
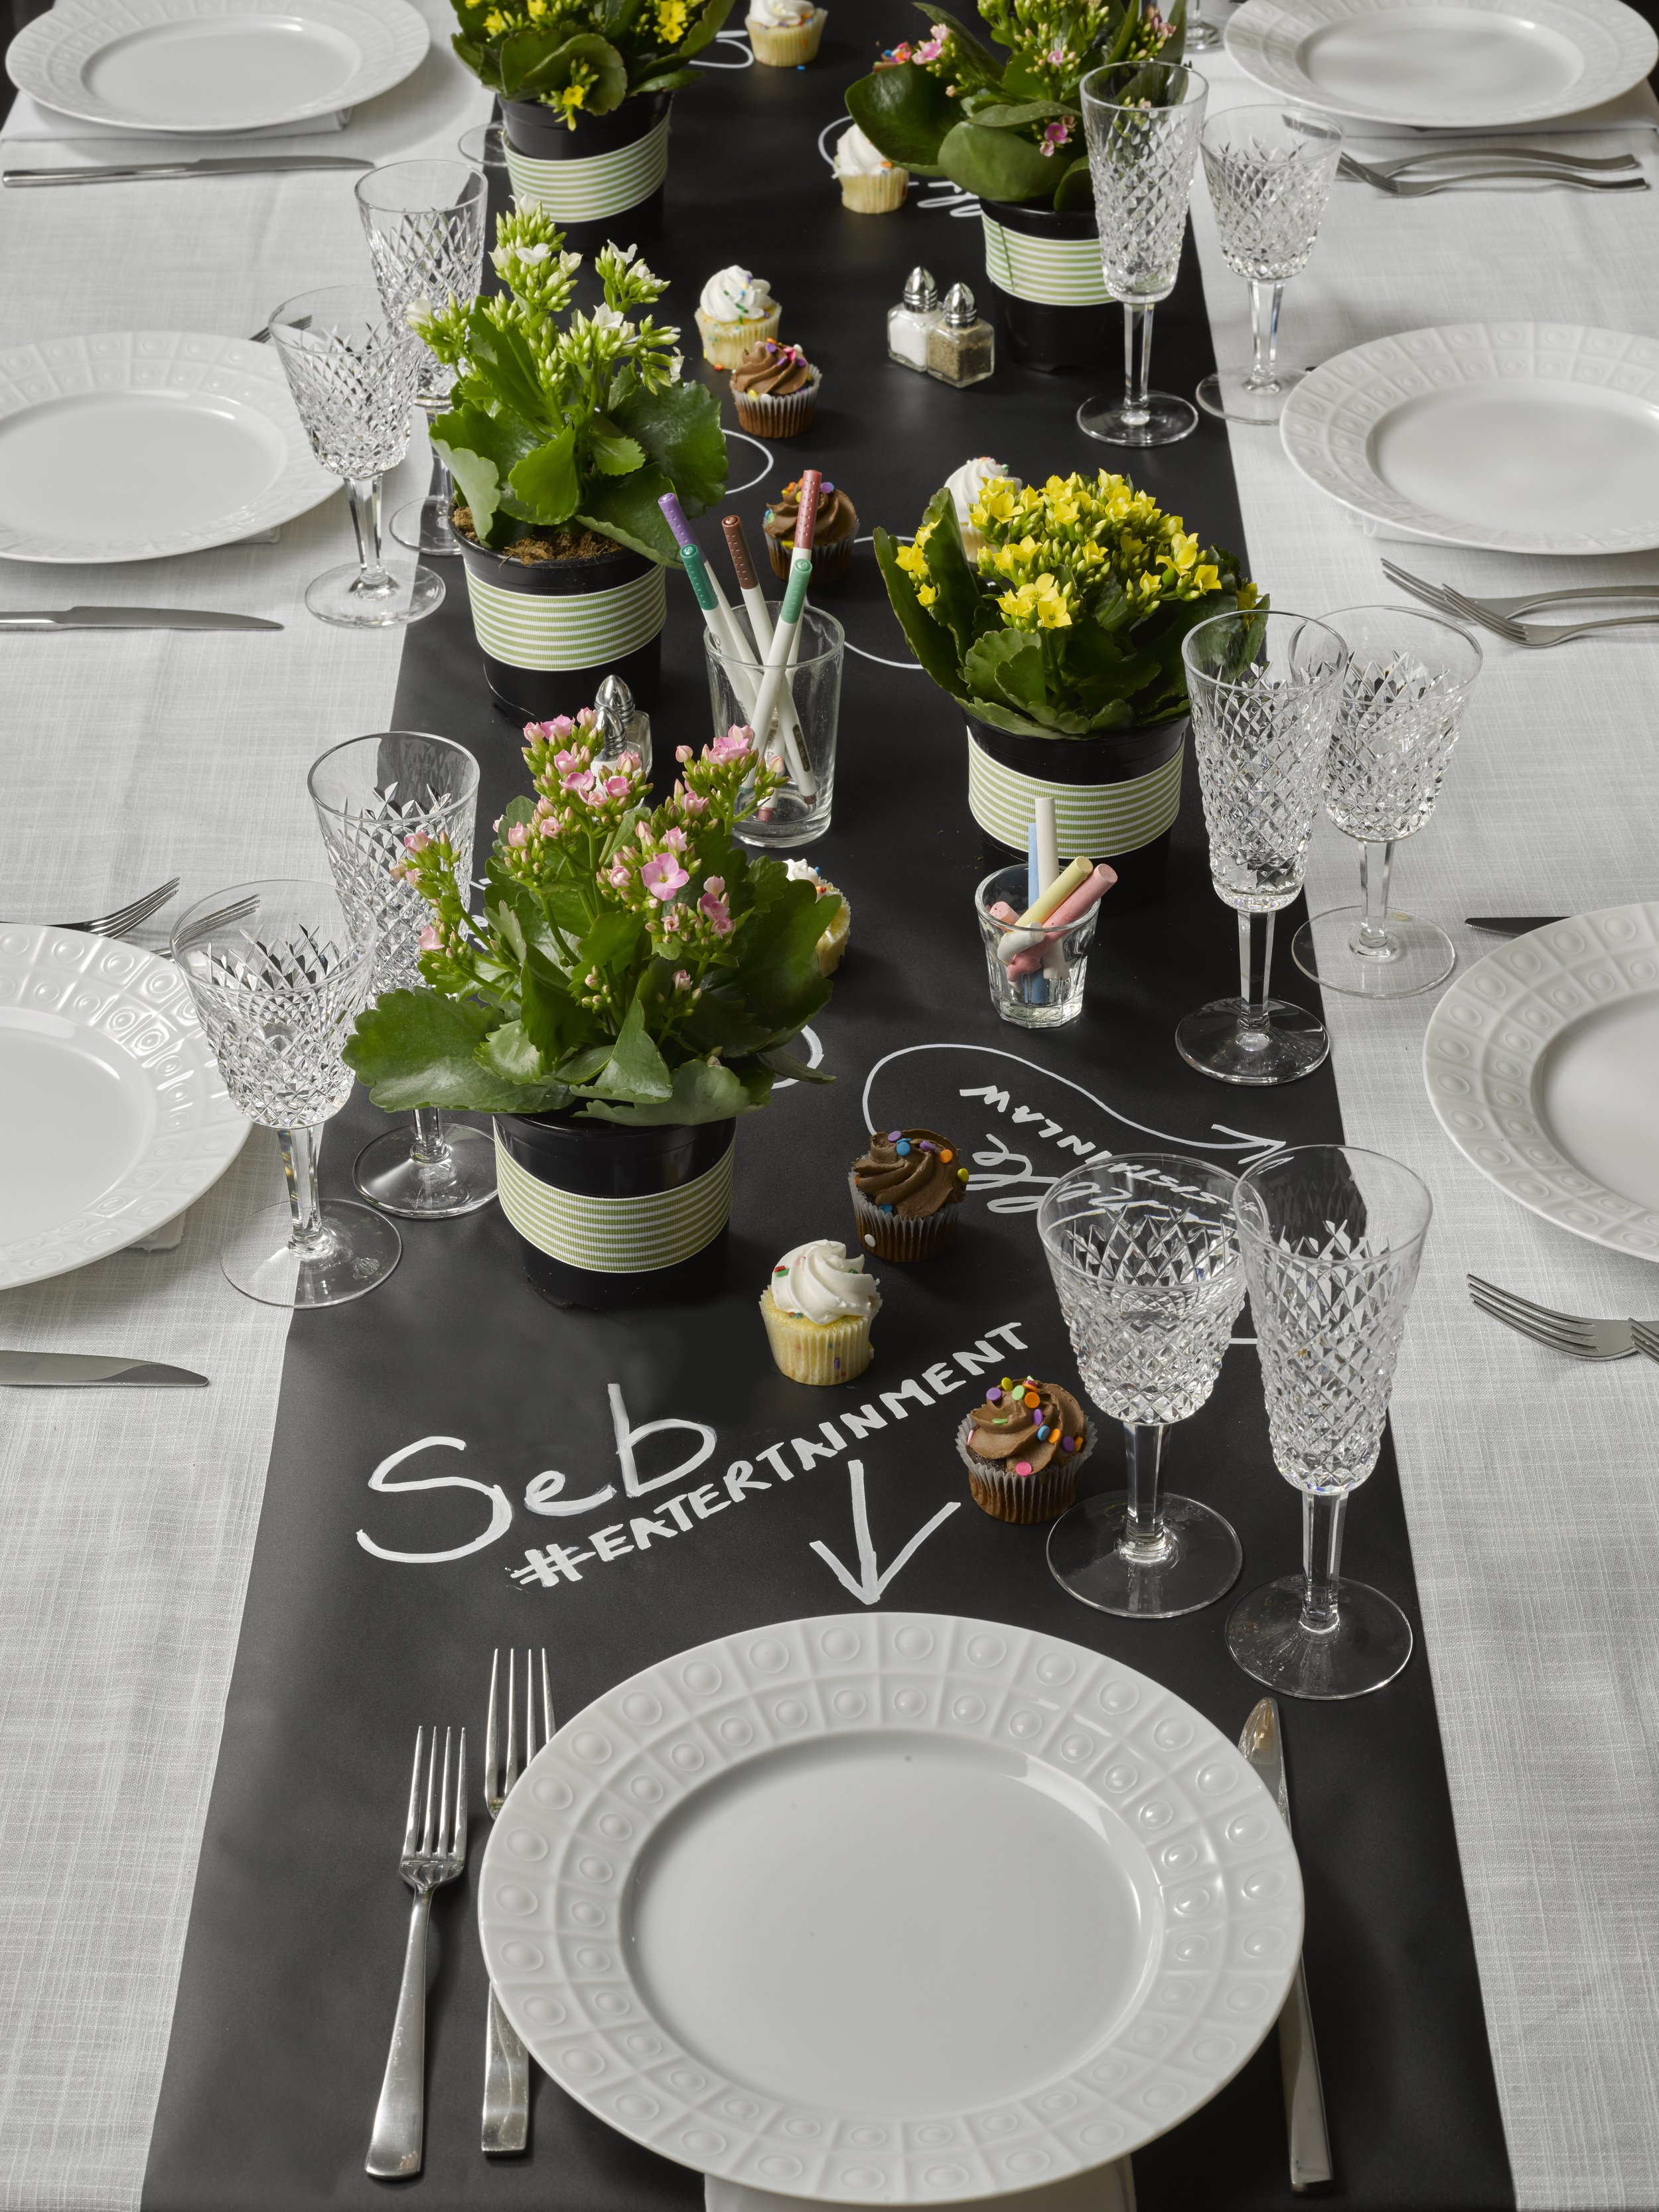
- A white linen tablecloth to add a touch of formality.
- The meal may not be fancy, but we invite our guests to dress up a little to add some elegant touches to make the event feel special.
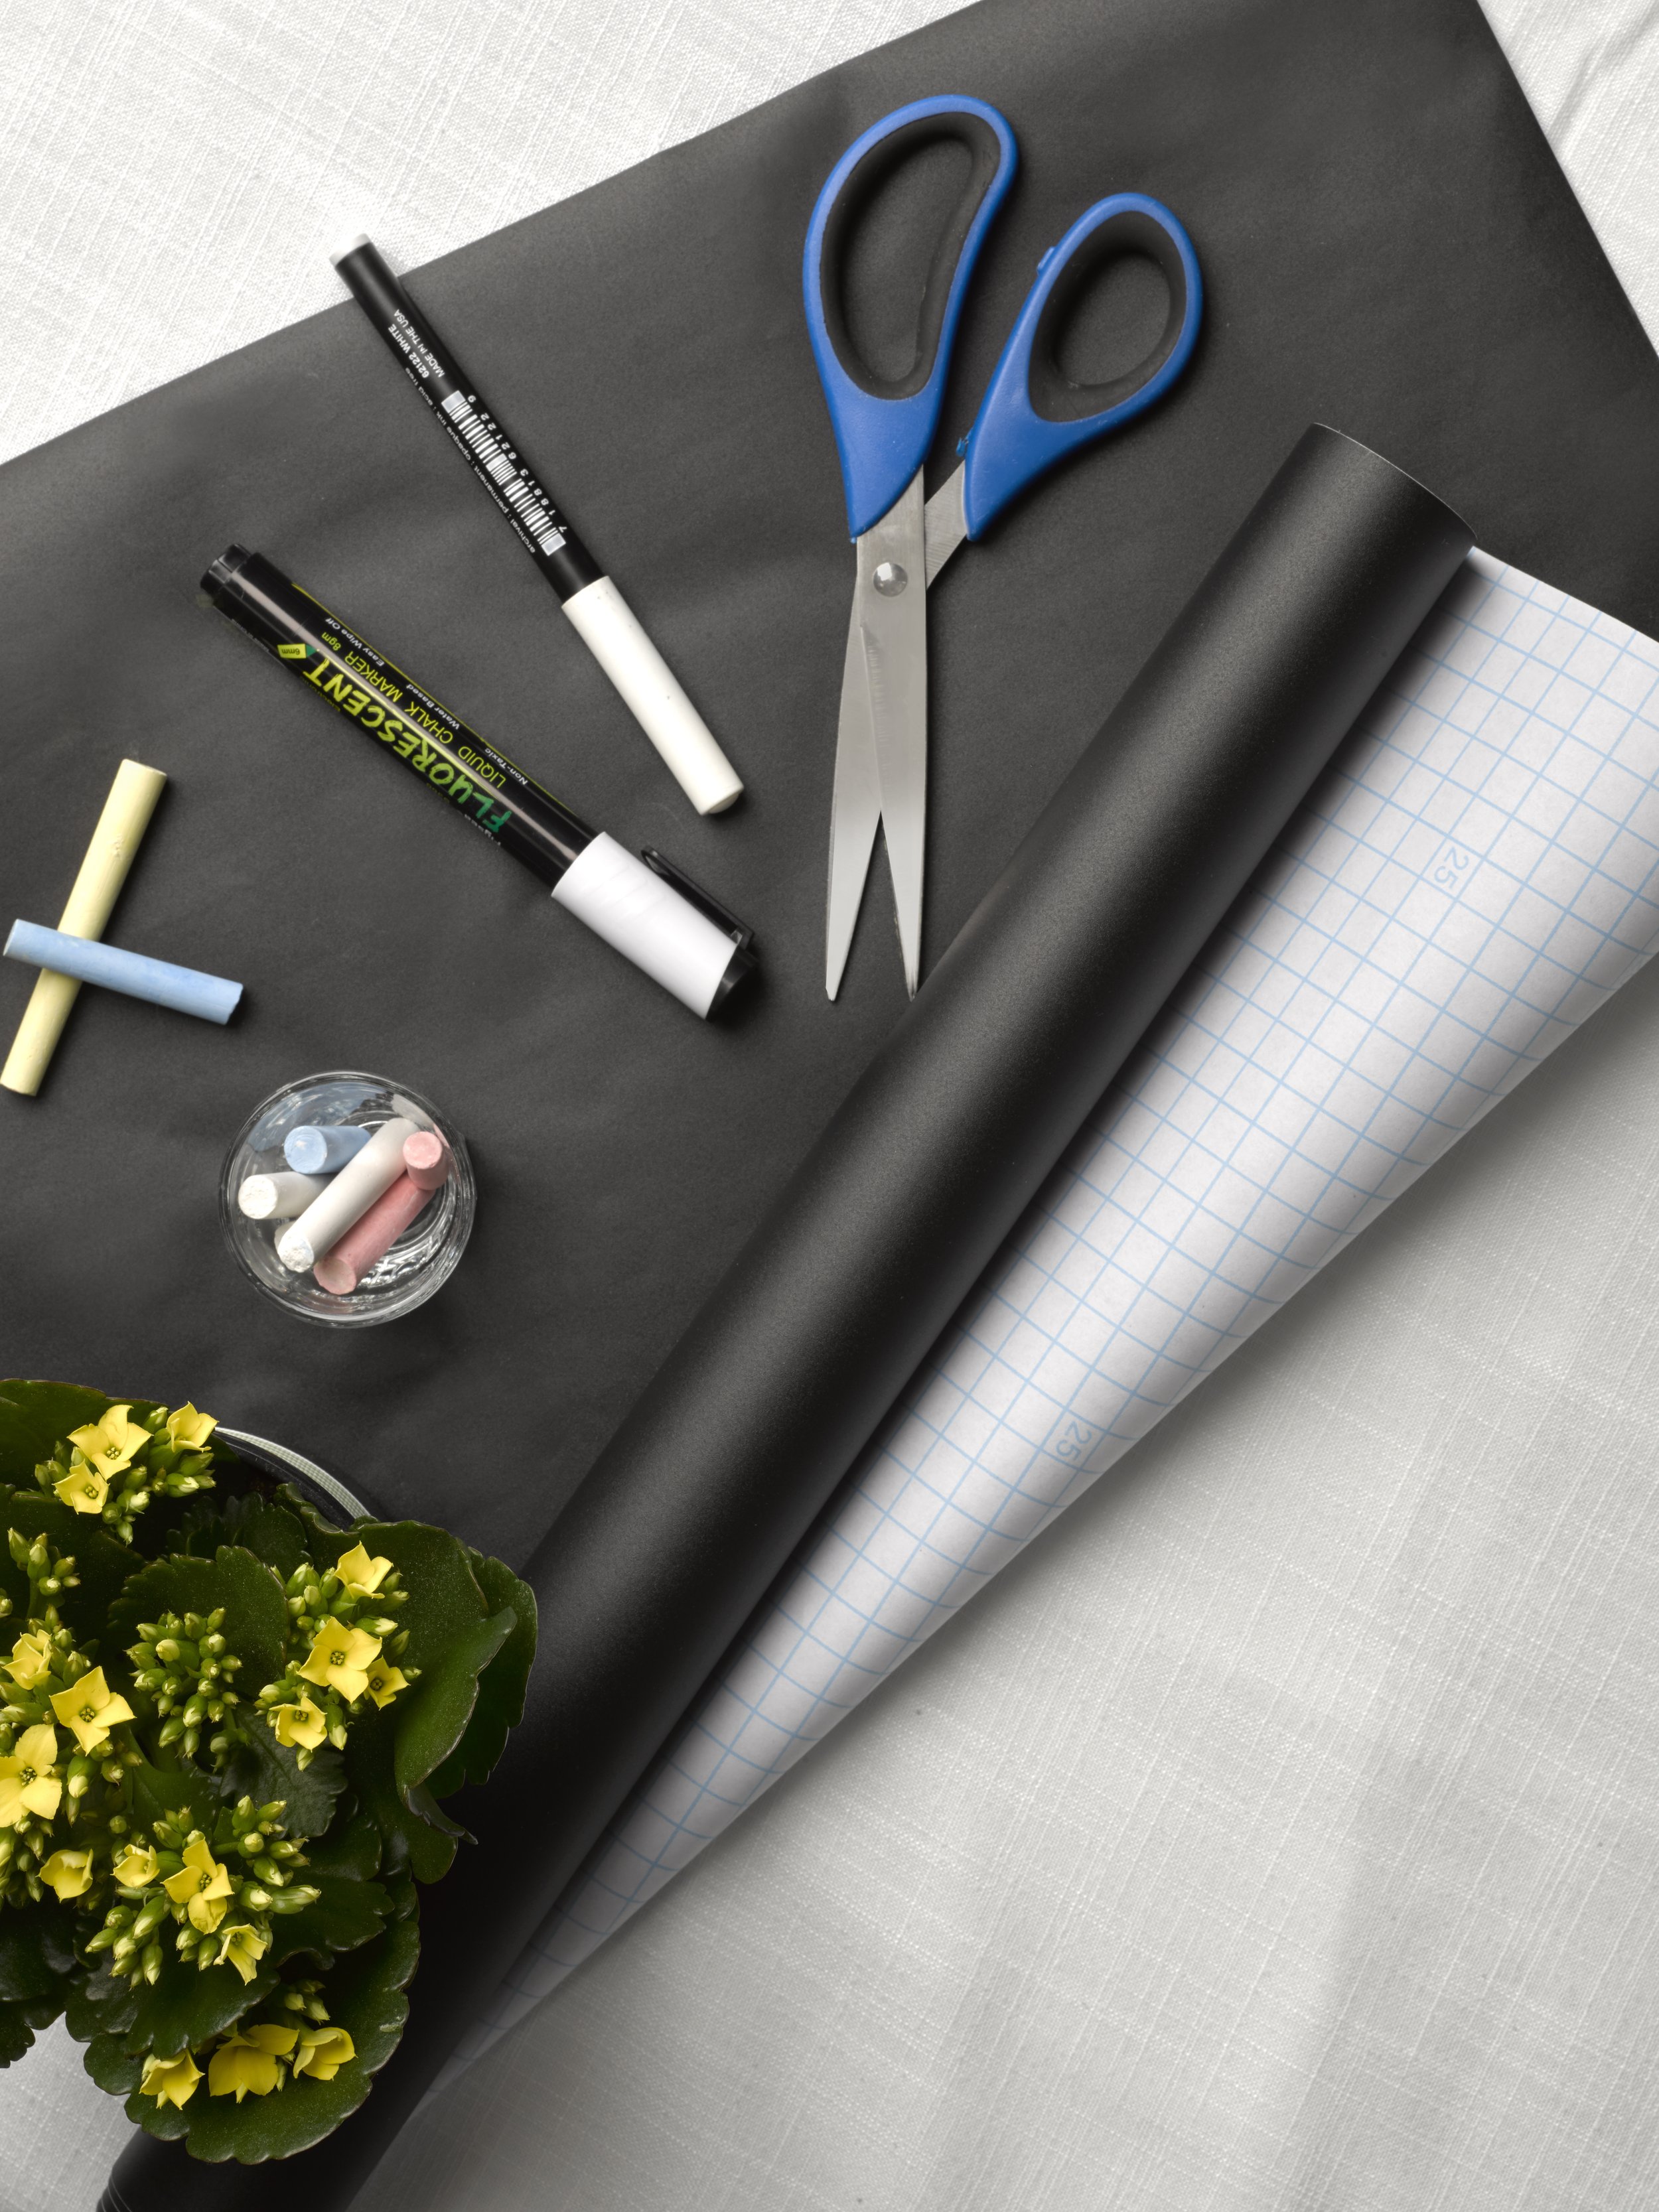
- As table runners, we prefer to use a roll of blackboard paper and offer each visitor a piece of chalk or even a little cup of coloured chalk. Since brunch can be enjoyed by visitors of all ages, this is a great interactive decoration to add to your brunch.
- Use everyday white plates and basic silverware to match the tablecloth.
- We like to add a little pop and elegance to our table to bring out our beautiful crystal glassware. While we aren't afraid to risk our nice glassware in front of a mixed-age crowd, younger guests may prefer more easily replaced glasses.
- Place tiny pink florals and cupcakes at each place setting to help tie the whole table setting together and add a touch of whimsical fun.
- Use sticky notes to keep track of what you'll be serving on each platter when you're getting started. It also helps your kitchen helpers understand what will be served and where.
- Even though this meal will be served buffet-style, each dish should be strategically placed so your guests don't miss anything as they work their way down the counter.
- Sort each dish by type: hot food first, then seafood, cheeses, bread, salads, fruits, and desserts. To tie the décor together, scatter a few vases throughout the buffet and by the prosecco bar.
We hope these tips help you enjoy your spring brunch! Is there anything we've missed? Leave your own ideas and tips in the comments!
Be sure to check us out on Instagram @sebandsheila!
Muffin Pan Baked Mini Egg Pancake Recipe
Did you catch @sebcentner on @themarilyndenisshow?
During the festive Easter brunch segment, Seb showed us some of the most delicious mini dishes that would bring any bunny joy, and we are sharing our favourite mini dish. It's the mini egg pancake bites! 🥞😋
This sweet treat is so easy to make. Baking them in a muffin pan has to be the simplest way to make them since you don’t have the stress of executing the perfect flip!
What’s even better is that adding your favourite flavours and toppings also becomes way more manageable. You can add mini eggs for the festive theme, but you can do any combination of fruit, nuts, chocolate, etc. We hope you took notes because we will be sharing this amazing recipe.
Click the link to get the recipe and happy Easter from us! 🐣🎉
Rainbow Veggie Board
Who says Easter brunch has to be all about eggs and bunnies? 🐰🥚 Get ready to add some colour to your table with this vibrant and oh-so-healthy rainbow veggie board! 🌈🥕🥦 It’s not only gorgeous to look at, but it’s also packed with all the nutrients your body needs! 🙌
Dos:
- Do choose a variety of colourful veggies for maximum visual impact
- Do slice your veggies thinly and arrange them in a rainbow pattern
- Do serve with a tasty dip for extra flavour
Tips:
- To make your veggies last longer, store them in a container of water in the fridge
- Use a mix of raw and blanched veggies for a variety of textures
- Add fresh herbs and edible flowers for an extra pop of colour and flavour
Try this at your next brunch gathering, and be sure to tag us in your recreations!
A Perfect Spring Brunch
The blooms have arrived, as has spring! We are excited to venture on this month-long adventure of "A Perfect Spring Brunch"
Spring heralds not only warmer weather but also outdoor entertaining. The thought of lighter, brighter meals—and fewer layers—gets us excited about seeing friends we've missed over the last few months as the early blooms begin to appear. While it is our family tradition to host a large brunch during the holidays, we believe brunch should be more than an annual event. We also enjoy hosting weekend brunches because they are a more relaxed way of entertaining and make a regular Saturday or Sunday feel extra special.
We recommend hosting brunch outside whenever possible, weather permitting! Something is refreshing about dining in the garden, surrounded by fresh air and beautiful greenery. However, if you're hosting in the winter or the weather isn't cooperating with your plans, there's nothing wrong with hosting your brunch indoors.
Regarding brunch, we believe in the adage "the more, the merrier." Brunch is the ideal time to host people of all ages and interests, whether it's neighbours who hosted you previously or friends you haven't seen in a long time, especially during the Easter season.
Brunch is also easy to prepare. Our spring brunch features colourful and flavorful dishes, as well as bright, airy décor elements that instantly lift your spirits as you reconnect and start making plans for the summer months.
Don't let us worry you! Most of the items can be prepped ahead of time, and serving brunch buffet-style relieves the pressure of constantly serving and clearing plates. Mixtures and batters can be prepared the night before, and anything hot can be prepared ahead of time and kept warm in the oven until ready to serve.
When your guests arrive, all that will be left to do is set up the brunch buffet.
So, stay tuned while we take you all on a month-long adventure filled with an abundance of fresh ingredients, crisp cocktails, and a meal that celebrates everything that is spring!
Be sure to check us out on Instagram @sebandsheila!


