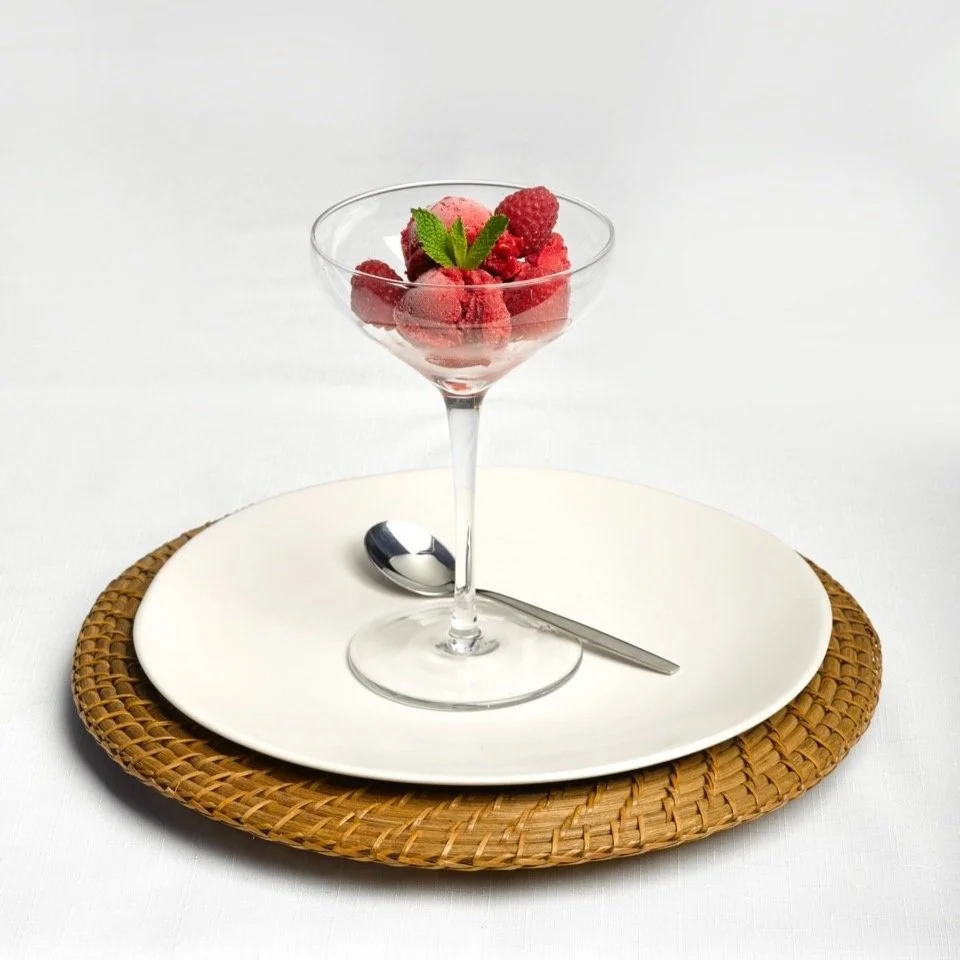
Are you a sweet or savoury dessert person??
Believe it or not - some people actually don't like a sweet treat at the end of a meal. Creating a cheese plate option is a perfect solution in this case!
This European trend of having cheese as dessert is catching on more and more every day. And the best part about cheese for dessert is that it's fast and easy to prepare as the host!
The number of cheeses we like to offer depends on how many people we're hosting, but as a basic rule, we aim to have at least 1 1/2 oz per person and a minimum of three kinds of cheese to choose from. We like to cover all the main categories, including cow's milk cheese, sheep's milk cheese, and goat's milk cheese. Specific favourites of ours include brie, camembert, reblochon, Tomme de Savoie, caprice des dieux, chevre, and tomme de Pyrenees. You can serve a cheese board and allow guests to help themselves but to add a touch of formality we sometimes like to make individual mini cheese plates for each guest.
The Cosmopolitan Cocktail Drink
Since we are regular celebrators of Cocktail Friday, why not share this month's cocktail today!?
While we love experimenting behind the bar, there's a reason those classic cocktails have remained on every drink menu for decades. Today is all about one of those classics - the Cosmopolitan 🍸
It’s light, a little tart and fruity, it pairs with nearly every food, and it just looks elegant! If this isn't in your arsenal of go-to cocktails, it's time to add it! Save this down and get to mixing!
Ingredients (for 1):
1 1/2 oz vodka
2 tbsp cranberry juice
1/2 oz Cointreau
1 tbsp simple syrup
Lime wedge or twist for garnish
How to:
Place vodka, cranberry juice, Cointreau, and simple syrup in a cocktail shaker, add ice and shake vigorously. Strain into a martini glass and garnish with a lime wedge or twist.
Cheers!
Be sure to check us out on Instagram @sebandsheila!
Ham + Béchamel Baked Tomatoes
A Winter Warm-Up gathering is all about comfort food.
We want the aromas of rich, decadent courses filling our home, and creating the perfect atmosphere for a long evening of great conversation.
As guests finish their welcome cocktails and slowly move on from delicious canapés, it's time to start the seated portion of the meal. The first course will make you feel like you just came in from skiing: Ham + Béchamel Baked Tomatoes (page 153 of Eatertainment). Sebastien's mother passed this classic winter dish down to us and is a family favourite. Not to mention that it seamlessly fits into this winter theme!
Ingredients (serves 6):
6 ripe medium-sized beefsteak tomatoes
1/2 cup butter
1/2 cup all-purpose flour
2 cups milk
1 cup shredded Emmental cheese
1 tsp smooth Dijon mustard
Black pepper
8oz Black Forest ham, cut into 1/4-inch cubes
How-to:
1, Preheat oven to 375. Line a baking sheet with parchment paper.
2. Cut a thin slice from the bottom of each tomato so that it sits flat. Cut the tops off of the tomatoes and set aside.
3. Hollow out the tomatoes, removing most of the flesh and seeds, but be careful not to scoop out all the flesh and hit the skin. Place the tomatoes on the prepared baking sheet.
4. Melt the butter in a small saucepan set over medium heat. Whisk in the flour 1 tbsp at a time until fully incorporated. Slowly add the milk in a steady stream whisking, continuously until the sauce is totally smooth. Cook this béchamel for 2 minutes, still whisking, then stir in the Emmental. Add the Dijon and season to taste with pepper. Add all the ham to the béchamel. Stir to combine, then remove from the heat.
5. Spook the béchamel-ham filling into the hollowed-out tomatoes and bake until the top of the filling is golden brown and bubbling, about 20 minutes. Serve immediately.
And voilà! The perfect starter on a cold evening to warm your guests from the inside out!
Be sure to check us out on Instagram @sebandsheila!
DIY champagne sparklers
We're almost through the holiday season and dedicating our last two posts of the month to this weekend's final celebration - New Year's Eve!
Throughout this month, we've spoken endlessly about reusable and versatile decor. Nothing makes us happier than an item that can last throughout the season or can serve a dual purpose.
This is why today we bring you these DIY champagne sparklers! The perfect final touch to your champagne flutes this Saturday night!
And who knew that a bit of tinsel from the tree could also elevate a glass of bubbly!?
All you need is:
Festive tinsel (gold or silver is ideal)
Medium skewers
A glue gun
scissors
How-To:
1. Before putting that tinsel away till next year, save a strand for this DIY.
2. Cut 1-inch pieces, as many as you need for your glasses.
3. With your glue gun, carefully glue a piece to the end of your skewer. Repeat until all skewers are complete!
4. Place these as garnishes into your flutes before popping the bubble, or fill the glass first - then add them.
Now your midnight toast just got a lot more festive!
Be sure to share your creations with us by tagging us on Instagram @sebandsheila!
Lemon & Herb Focaccia
Fresh-baked bread has to be one of the most comforting smells to waft through a kitchen. And while being able to bake the perfect loaf is an art form in itself, there are some simple recipes that any beginner baker can try - like our Lemon & Herb Focaccia!
Focaccia is a quick and easy no-knead yeast bread that's ready in about an hour. Not to mention this classic Italian crusty bread makes the most fabulous appetizer ever!
Ingredients:
2 cups warm water, 105-110F
2 tsp yeast
2 tsp table salt
4 cups bread flour
olive oil
2 cloves garlic, minced
Fresh rosemary
Fresh thyme
2 lemons, sliced paper thin, seeds removed
Sea salt for sprinkling over the top
How-To:
1. Preheat your oven to 425F
2. Add yeast to a large mixing bowl and pour in the warm water.
3. Add the salt and 2 cups of flour and mix into a soft, sticky dough.
4. Add the remaining 2 cups of flour and mix well. (Don't worry, the dough is supposed to be a bit sticky)
5. Cover and let rise for 40 minutes.
6. Oil a 9x13 baking sheet, and place dough on the baking sheet. Using your fingers, ease it into a rectangle.
7. Put the olive oil in a small bowl, dip your fingers into the oil, and start poking the bread surface and leaving little pools of oil. Do this all over the bread, your fingers create the iconic divers of the focaccia.
8. Arrange the lemon slices across the top, then scatter the rosemary and thyme. Sprinkle with coarse salt.
9. Bake for 18-25 minutes until lightly golden.
Pro tip: save some fresh rosemary and thyme to add after baking since the oven will dry up the sprigs added prior!
Now sit back, and enjoy your pillowy and delicious creation!
Be sure to check us out on Instagram @sebandsheila!
Festive Holiday Cranberry Martini Cocktail
The Friday night before this Christmas weekend deserves the most festive holiday cocktail!
The Cranberry Martini is cheery all on its own, but served on ice in ornaments? It's a creative straight off of Santa's bar cart. (check out our Reels for a little video how-to!)
Ingredients (per one cocktail):
2 oz cranberry juice
1 oz vodka
½ oz orange liqueur
½ oz dry vermouth
1 sprig of rosemary
How-to:
1. Get some fillable ornaments balls from your local craft shop or @Amazonca.
2. Batch your cocktail by multiplying the ingredients by the number of guests attending. Place all ingredients into a pitcher and stir until well combined. Portion into your fillable ornaments, placing them carefully onto a tray keeping them upright (the tops likely don't seal and with leek, if tipped over). Store them in the fridge until guests' arrival.
3. When ready to serve, add a few ice cubes to a coupe or martini glass with a sprig of rosemary. Place one ornament in the glass, balanced on top of the ice cubes.
Serve to guests immediately and watch their eyes light up as they take in the presentation of this cocktail!
Be sure to check us out on Instagram @sebandsheila!
Roasted Veggie and Halloumi Salad with Roasted Honey Garlic Dressing
The best winter salad you'll ever make: Roasted Veggie & Halloumi Salad with Roasted Honey Garlic Dressing
Ingredients:
1 lb butternut squash peeled and cut into ¾-inch chunks
1 lb Brussels Sprouts stems trimmed and sliced lengthwise in half
2 tablespoons extra virgin olive oil
¾ teaspoon Diamond Crystal kosher salt
freshly ground black pepper
2 x 250g packs of halloumi, each block cut into 6 slices
1 pomegranate, seeds removed
1 golden pear, sliced and cut into thin bite-sized pieces
1 cup chopped purple cabbage
1 cup roughly chopped walnuts
142 grams mixed greens (one container)
For Dressing:
1 garlic bulb, roasted
2 tbsp lemon juice
3 tbsp extra virgin olive oil
1 tsp clear honey
How-To:
1. Preheat the oven to 450°F. Place garlic bulb (top cut off), the butternut squash chunks, and halved Brussels sprouts on a large baking sheet. Drizzle them with the 2 tablespoons of extra virgin olive oil, sprinkle them with salt & pepper, and toss them with your hands to distribute evenly. Spread the vegetables out evenly onto the baking sheet. Roasting Tip: Place the Brussels sprouts cut-side down, this will allow them to caramelize more evenly against the surface of the sheet pan.
2. Roast the vegetables for 20 to 30 minutes (time will vary depending on the size of your Brussels sprouts and butternut squash chunks), tossing them gently 1 to 2 times during the roasting time to ensure that they caramelize evenly on all sides. Remove from oven and set aside.
3. Put a griddle pan over high heat. When it’s really hot, add the halloumi and griddle for 45-60 secs either side.
4. To make the dressing, carefully squeeze the roasted garlic from the bulb into a small bowl. Add the lemon juice, oil, honey, and seasoning and mix until smooth.
5. In a large serving bowl, add your mixed greens, purple cabbage, roasted Brussels sprouts & squash, and grilled halloumi, and top with pomegranate seeds, walnuts, and pears. Drizzle dressing and serve family style!
Save this one down, you know you're going to make it over and over again!
Be sure to check us out on Instagram @sebandsheila!
DIY Rosemary Wreath Place Cards
Another day, another DIY!
These Rosemary Wreath Place Cards are the perfect addition to any holiday table!
We of course love working with this fragrant herb in the kitchen, but this time of year we like trying to think of a creative non-food way of using it.
Since these stems tend to resemble clippings taken straight from the Christmas tree, they are a seamless fit with the rest of our festive decor. This project is really simple. All you need are rosemary sprigs, floral wire, scissors, paper, thin-tipped sharpie, and thin ribbon.
How-To:
1. Cut strips of paper into your shape of choice, a simple rectangle will do - but if your feeling fancy, go for this banner style. Cut enough for your attending guests, and write their names in your best swirly cursive.
2. Cut floral wire into approximately 3-inch pieces.
3. Prepare the rosemary sprigs. You want them between 6 and 7 inches in length. Trim the tops and bottoms of each sprig so you're working with the fullest section.
4. Gently flex the sprig with your fingers to make it more pliable.
5. Grab each end of the sprig and make a circle by crossing the two ends. Secure with the pre-cut floral wire by winding it around the two ends together.
6. Tie your ribbon around the floral wire to cover it and make a bow.
7. Tuck the name tags into the rosemary leaves, and place them in their designated setting.
Hope you enjoyed another DIY creation!
Be sure to share your creations with us by tagging us on Instagram @sebandsheila!
One Pan Chicken Recipe with Fresh Cranberries and Rosemary
Nothing says casual holiday lunch quite like a quick and easy one-pan chicken recipe made with fresh cranberries and rosemary. And it is just as easy as it is festive! 🎄
Also, worth noting, is that you won't be stuck with a sink full of dirty pots and pans either. It’s all made in one baking dish + the blender!
Ingredients:
For the Cranberry Rosemary Marinade
⅓ cup fresh cranberries
2 tablespoons olive oil
2 tablespoons Worcestershire
2 tablespoons maple syrup
4 cloves garlic
1 teaspoon fresh rosemary leaves
¼ cup dry white wine
For the Chicken Thighs
3 pounds bone out chicken thighs (approximately 8 small chicken thighs)
½ cup fresh cranberries
4 sprigs fresh rosemary plus more for garnish, if desired
How-To:
1. Combine all marinade ingredients in a food processor or blender and process until smooth.
2. Place chicken, in whichever baking dish that fits the chicken best. Pour marinade over chicken thighs and spread marinade to coat chicken evenly.
3. Tightly cover baking dish with plastic wrap. Place covered dish in fridge and let chicken thighs marinate for at least 30 minutes, but no more than 24 hours.
4. Preheat oven to 375º Fahrenheit. Sprinkle ½ cup of fresh cranberries and 4 sprigs of rosemary into baking dish around chicken thighs. Cover with tin foil.
5. Place baking dish in preheated oven. Bake, covered, 25 to 35 minutes,
6. When chicken reaches desired temperature, remove dish from oven. Preheat broiler to High.
7. Brush 1 tablespoon maple syrup over chicken thighs. Broil until thighs are golden brown but not burnt, keep a close eye because timing depends on broiler.
8. Remove baking dish from oven. Garnish with fresh rosemary sprigs and serve immediately with plenty of sauce from baking dish.
Our first recipe of the month is definitely one you'll be making through these colder months - so be sure to save this one down!
Be sure to check us out on Instagram @sebandsheila!
Pomegranate Holiday Season DIY Decor
If you're anything like us (or most people we know) the next 4 weeks are jam packed with gatherings of all sorts.
What seems to be the toughest hurdle to get over this time of year is finding time to host and attend all the events getting added to your calendar.
Our biggest tip for those who are looking to bring their friends and family together, but struggling with schedules, is to keep in mind that it doesn't need to be a fancy sit-down dinner to qualify as a festive gathering.
Weekends and evenings are the first to fill up, so don't restrict yourselves to those times! That's why, this month, we're going to share tips on hosting a Casual Holiday Lunch.
From simple recipes to the most festive cocktail, easy DIY decor, and creative guest takeaways. This month is full of everything you need for an effortless holiday gathering.
First on the to-do list, is the decor! You don't want anything over complicated or pricy for a casual affair, so we like to incorporate simple elements that naturally fit the theme. One of our favourite elements to utilize this time of year are pomegranates! The gorgeous red hue pops on any tablescape, and they're also in season - making them totally accessible. Not to mention they can be used in your next recipe or as a snack once they've fulfilled their decor needs!
Here are two easy ways to use this gorgeous fruit on your next tablescape!
Stay tuned all month long, this is just the beginning!
Be sure to share your creations with us by tagging us on Instagram @sebandsheila!
Cocktail Station Menu
It's time to add the final touch to your cocktail station - and no station is truly complete without a menu!
We love a decor piece that serves a purpose, and menu signs are a perfect example. Let guests know what is what while tying in your theme and adding an eye-catching visual.
This is also such a fun way to let guests see you've put in the extra effort for the evening ahead, without actually putting in too much effort at all!
All you need is your custom menu design and an empty picture frame!
Happy Halloween everyone!!
Hellfire Caesar
Our last cocktail of the month is devilishly good - and a familiar flavour for our Canadian followers!
Say hello to the Hellfire Caesar 🔥
Ingredients:
8 ounces clamato juice
1 ounce vodka
1 tablespoon hot sauce (Frank's RedHot sauce)
1/2 tablespoon Worcestershire sauce
Pinch cayenne pepper, optional
2 green beans, for garnish (pickled)
Ice cubes
2 red hot pepper
How-To:
Fill a tall glass with ice cubes.
Add the remaining ingredients; give it a quick stir with a straw.
Garnish with red pepper tips for devil horns
Stuffed Onion Cups
Next up on the menu - our Stuffed Onion Cups, filled with sweet green peas and topped with salty feta and lemon zest.
This recipe makes for a beautiful and healthy counterpart to the bacon pretzels - and always seems to be among the first platters empty!
We thought of this one for our spooky soirée given the purple and green colour pallete is a bit witchy. Find the full recipe on page 36 of Eatertainment.
Tip: to keep the purple of your red onion more vibrant, marinate them in vinegar once you've separated the cups. This will brighten the colour of the onion and allow it to contrast beautifully against the peas.
Cocktail Party 101
Today is all about our key tips to make any cocktail party a success!
Have a welcome drink:
Signature cocktails are fun, chic, and unexpected. I find serving my guests a special cocktail as they walk through the door is a great way to make them feel welcomed!
Create a roadmap with decor:
Because a cocktail party is not sit down format, sometimes hosts struggle with creating a clear visual for guests to know where to hangout and mingle. Always strategically place decor elements at the bar, designated seating areas, and in any areas where food is presented.
Prep music:
Nothing completes a party atmosphere quite like the perfect playlist - and something many hosts forget to prepare ahead of time. Luckily for you guys, we've done the heavy lifting by creating a number of curated playlists perfect for your next party. To browse our tunes, check out our link in bio!
Have basic options:
For your less adventurous guests, have a few basic wines and liquors available should they noot want to experiment with specialty cocktails. Also don't forget about non-drinkers, so have soft drinks cold & ready too!
Go batched:
For larger groups, if you choose too many complex cocktails, you'll end up bartending all night. Try to mix up your offerings with some batched cocktails (or batched versions of the specialty). It becomes much easier to continue serving as the evening progresses.
And of course - have FUN!!
Brie 3 Spooky Ways
It's rare that a cheese board is complete without brie! To fit this month's theme - here are 3 ways to spookify this crowd favourite!
1. The Coffin ⚰️
2. The Pumpkin 🎃
3. Bats 🦇
Mimosa 'Injection Station'
Who knew mimosas could be creepy? 🥂💉
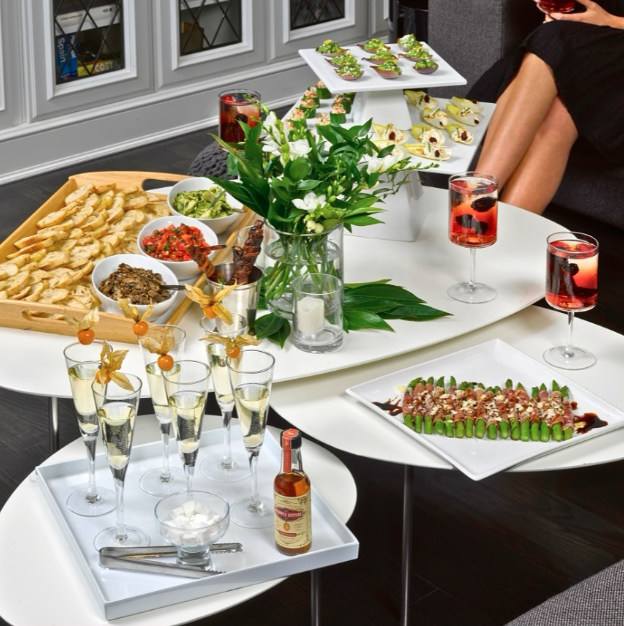
Mimosas are a fantastic drink for cocktail parties of all sizes because they’re easy to make and taste amazing, and very few people will say no!
The 'Injection Station" is our Halloween twist on the classic mimosa bar!
Simply pre-fill syringes with various red juice options, and allow guests to "inject" their sparkling wine!
Tip: Consider setting this station up near your front entrance. Mixing this cocktail takes only a few seconds and provides some entertainment as guests arrive!
Bacon Wrapped Pretzels
Cocktail party food is all about grab & go - guests need to be able to eat while standing. So think easy canapés, single serve items, or grazing stations.
Our Bacon Wrapped Pretzels are perfect for your Halloween bash, since they're always a hit - and can pass as a haunting canapé in the right atmosphere!
All you need is:
3/4 lb thin cut bacon (about 12 slices)
1 cup packed brown sugar
3 tbsp chili powder
1 tsp sea salt
1/8 tsp cayenne pepper
12 pretzel rods
Check out page 34 of Eatertainment for the full recipe!
Liquid Ghost Cocktail
Our first spooky cocktail of the month has both booze and boos! The Liquid Ghost is equal parts spooky and delicious! 👻
Ingredients:
1 ounces vanilla vodka
1.5 ounce Disaronno velvet
2 ounces cream
How-To:
Add 1 cup of ice to cocktail shaker. Pour in all ingredients, shake to combine.
Pour cocktail into martini glass and serve. Garnish with liquorice wheel and serve immediately!
Definitely save this one down - you'll need it in a few weeks!
Fridge-Space Saving Party Tip
This month we're taking it back to basics - with a spooky twist of course.
Many people think that hosting requires lots of work, time, and effort, but it doesn't have to be like that. The trick is to start small, get comfortable, and then slowly add elements as you become more at ease with hosting.
Casual or impromptu get-togethers account for most of the entertaining we do, and often they are just as appreciated by our guests as a five-course meal. We don't let a hectic schedule keep us from indulging in our love for gathering together friends and family-and neither should you!
Known in some quarters as a cinq à sept in homage to the typical cocktail hours of 5:00 pm to 7:00 pm in France, a cocktail party is a fun and simple way of socializing without the pressure of preparing a full dinner. As such, it's especially well-suited to those who may be new to entertaining or aren't yet ready to pull out all the stops. For us, cocktail parties often make for our most memorable evenings, with lots of laughter and great conversation, since they let you mingle with different people throughout the evening, instead of only chatting with the people sitting near you at the table.
One of the best things about a cocktail party is that you can adjust your menu based on how many people you're accommodating. And of course, we're adjusting this month's cocktail party to suit a Halloween themed atmosphere!
Let's start things off with one of favourite fridge-space saving tips! It's as easy as it looks: ice + sink + bottles of your favourites beverages! The final spooky touch is up to you 💀
Chocolate Fondant Cake with Honey Poached Oranges
We saved the best for last - dessert!!
After a hearty meal, sometimes guests don't have much room for a sweet final course, so we recommend serving a small on-theme dish.
Luckily for you, we included two options in this chapter! Our Poached Oranges with Honey or a small slice of our Chocolate Fondant Cake - or both!!
These dishes do take a bit of time to prepare, so bear that in mind when you're doing your prep. But just know that the out come is so worth it!!
Full recipes can be found on page 252 of Eatertainment!!
Be sure to tag us in your creations - and happy hosting!


